Multilingualism
AtroCore supports two types of multilingualism:
- Data Multilingualism - allows storing content in multiple languages
- UI Multilingualism - controls the language of the interface (menus, settings, field names, etc.)
Data Multilingualism
By default, AtroCore has English as the main language, but you can change this and add additional languages.
Configuration
To enable multilingual functionality you will need at least one additional language. To add an additional language go to Administration > Languages:

Click Create Language to add new language.

- Name - set the name of the new language
- Code - select language code from the list
- Role - only one Main language may exist, Additional should be used for languages to be translated into
Important Notes:
- The system allows only one main language. To change the main language, you need to modify the value of the existing main language item.
- When deleting a language, the input field and its value will be removed both from the database and system interface.
- If a deleted language is restored, the input fields will be restored to the system interface, but with no data in them.
Multilingual Fields
Currently the following field types can be made multilingual in the AtroCore system:
| Field Type | Description |
|---|---|
| HTML | Field type for storing HTML-formatted content in multiple languages, which contains a built-in HTML editor |
| Markdown | Field type for storing Markdown-formatted content in multiple languages, which contains a built-in Markdown editor |
| String | Field type for storing short text values (up to 255 characters) in multiple languages |
| Text | Field type for storing long text values in multiple languages |
| Array | Field type for storing an array of string values in multiple languages |
| Boolean | Checkbox for the product attribute that can be added for each active locale |
Additionally, List and Multi-value List field types can use multilingual lists where values are translated.
Creating Multilingual Fields
To create a multilingual field, go to Administration > Entity Manager, open an entity where you want to create a field and click + in the Fields tab:

In the new window that opens, click the Add Field button and select one of the field types that can be made multilingual:

On the entity field creation page, specify all necessary parameters and select the Multilingual checkbox to enable automatic creation of multilingual fields:
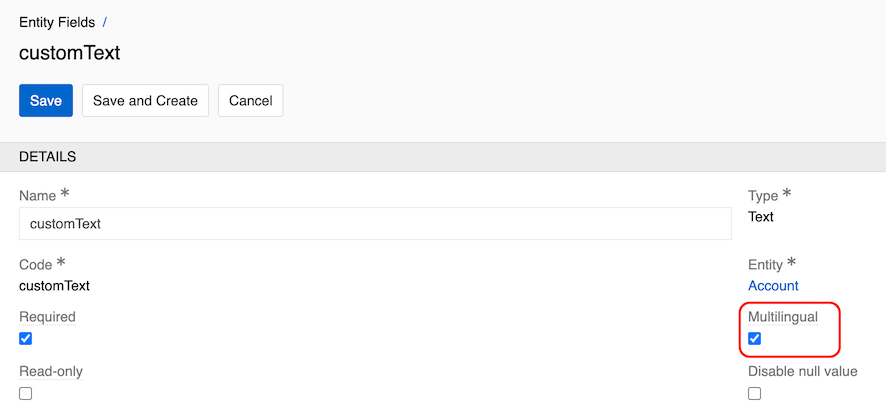
This will generate the main field and locale versions for all languages that have been activated.
Editing Multilingual Fields
You can change a non-multilingual field into a multilingual one. To do so, click 3 dots in the table to open a pop-up menu:

Then, edit a field of a type that can be multilingual:

If your system is already integrated with an external system, and you make a simple field multilingual, you may need to change the mapping to ensure correct work with the external systems.
You can not add multilingual fields to layouts individually. They are always displayed after the main language, in the order in which the languages are added.
Multilingual Lists
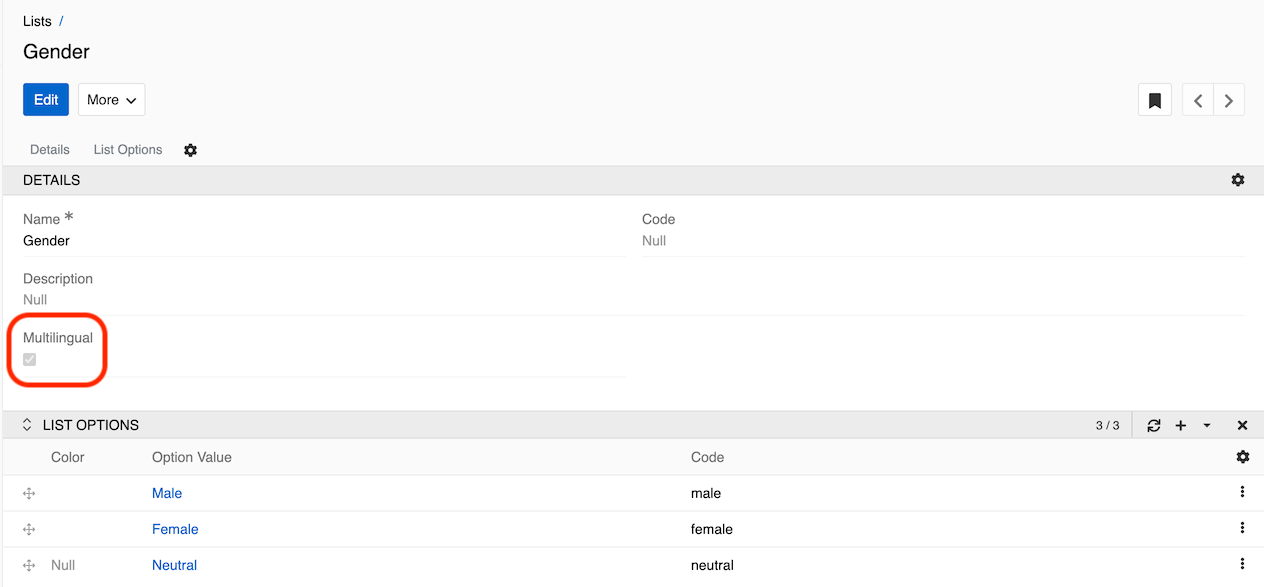
List option values can be translated into different languages. To enable translations for a list, go to Administration > Lists, open the required list, and activate the Multilingual checkbox:
To add translations for list options, edit the option and enter the translated value in the corresponding language field:

Note that translated list values are used primarily for export purposes. The translations do not affect the user interface display of the list values.
Access Rights for Multilingual Data
You can grant different roles separate read/edit permissions to multilingual fields. Go to Administration > Roles > 'Role name' and click Edit:

On the FIELD LEVEL panel, find the entity you wish to configure, click + next to it and select the multilingual field to be used as a filter:

Configure read/edit rights via the corresponding drop-down lists:

UI Multilingualism
UI multilingualism is managed through the Locales system. Locales determine the language in which you see menu items, settings, field names, and other interface elements.
You can switch between locales using the Locale menu in the Taskbar:

You can also filter out any or all additional languages:

Managing UI Translations
Translations of all system entities are stored in the Label entity. To edit translations, go to Administration > Labels:

When you add a new locale, a new column for its translations will automatically appear in the Label entity. Use the filter to find the key you need and edit it:

The Customized checkbox is selected automatically if the translation was set or changed from the user interface. It is also set for fields created by the user.
A multilingual field can also be translated into additional languages in the field settings. To open a modal window for setting labels in other languages, click the globe icon in the upper right corner of the field name.

Multilingual field tooltips
The tooltip for a field should be set separately for each interface language. To set a tooltip value in all languages, click on the globe icon in the upper right corner of the "Tooltip text" field.

Enter the value of the tooltip in all languages in the opened modal window and click the Save button.
