Record management in AtroCore encompasses all operations you can perform on entity records, regardless of the specific entity type. This guide covers the fundamental operations that apply to any record in the system, from basic CRUD operations to advanced relationship management.
For detailed information about the user interface elements, views, and navigation, see the Understanding UI documentation.
Listing Records
The list view is the primary interface for viewing and managing entity records. When you select any entity from the navigation menu, you'll see a table displaying all records for that entity.
Opening Records
To open a record and view its details, click on the Name field of the record. This will take you to the detail view where you can see all information about the record, its relationships, and related data.
Alternatively, you can use the three dots button (⋮) and select "View" action to open a record — for example, if the entity does not have a Name field.
Record Presentation
Records are displayed throughout the system — in list views, tree navigation, dropdowns, link fields, and other interface elements — using a priority-based identifier:
- Configured identifier — if a specific field is designated as the record identifier for an entity, it takes priority and is used everywhere.
- Name — if no identifier is preset, the system falls back to the Name field.
- ID — if neither a preset identifier nor a Name field exists, the record's ID is displayed as a last resort.
Common examples of preset identifiers include:
- Code — used in entities where a unique code is the primary identifier.
- Number — used in entities such as Cluster, where an auto-increment Number field serves as the record identifier.
For multilingual behavior of the Name field and other identifier fields, see the Locales.
List View Features
The list view provides several key features for record management:
- Sortable columns - Click any column header to sort records ascending or descending
- Search and filtering - Use the search panel to find specific records
- Record selection - Use checkboxes to select individual records or all records
- Mass actions - Perform operations on multiple selected records
- Single record actions - Actions available for individual records
For detailed information about list view interface and navigation, see the List View section. For record selection methods, see the Mass Actions documentation.
Creating Records
Creating new records is straightforward across all entities. There are several ways to create records depending on your current context:
From the List View
- Navigate to the entity's list view
- Click the
Createbutton - Fill in the required fields in the creation form
- Click
Saveto create the record orSave and Createto create and start a new one
From the Navigation Menu
Each entity type has a Quick create button in the navigation menu that opens the creation form in a pop-up window.
For detailed information about create views, see the Create View section.
From Related Records
When working with records that have link fields to other entities, you can create new records directly from those fields when they are in edit mode:
- Open a record in edit mode (or use in-line editing on a target field)
- Navigate to a link field (e.g., Classification field in a Product)
- Click the
+button next to the field - Fill in the required fields in the pop-up
- Click
Saveto create the record
This method automatically links the newly created record to the current record. Note that you'll need to save the current record separately to persist the link.
You can also create records from Multiple Link fields using the related entity panel's + button, which works the same way.
For detailed information about create views, see the Create View section.
Required Fields
Fields marked with an asterisk (*) are required and must be filled in before the record can be saved. By default, only the Name field is required, but administrators can configure additional required fields for each entity.
For information about configuring required fields, see the Fields and Attributes documentation.
Editing Records
Editing records allows you to modify existing data and update record properties. There are several ways to edit records in AtroCore.
Full Edit Mode
The primary way to edit records is through the full edit mode:
- Open the record's detail view by clicking on the record name in the list view
- Click the
Editbutton or Press Ctrl+E to enter edit mode - Make your changes to the fields
- Click
Savebutton or press Ctrl+S to apply changes orCancelbutton or press ESC to discard them
Quick Edit Mode
You can also edit related records from another record's detail view:
- Open a record's detail view (e.g., a Classification)
- Navigate to a related entity panel (e.g., Products panel)
- Click the three-dot menu next to a related record
- Select
Editfrom the single record actions menu - The related record opens in edit mode in a pop-up window
- Make your changes to the fields
- Click
Saveto apply changes orCancelto discard
This is the most common scenario for quick edit mode. You can also edit records directly from the list view using the same pop-up approach.
Both full edit mode and quick edit mode use the same layout - the only difference is that quick edit opens in a pop-up window.
For detailed information about edit view layout and navigation, see the Edit View section.
In-Line Editing
For quick field updates without entering full edit mode, you can use in-line editing:
- Open the record’s full detail or list view.
- Either:
- Click on an editable field, or
- Hover over it and click the pencil icon.
- Make your changes directly in the field.
- To save: click Update (for detail view), press Ctrl+S, or click outside the field.
- To discard: click Cancel or press Esc.
When you click on a field, it enters edit mode, the browser focuses on the field, and the cursor is placed at the end.
In-line editing allows you to modify individual fields without putting the entire record in edit mode.
Inline editing is also available in the record comparison functionality. You can edit field and attribute values directly in the comparison table.
If an attribute is added to the layout, users can edit, add, or delete its value directly from the record view.
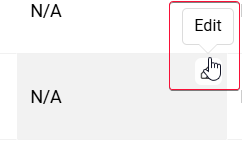
- If an attribute is not added to the record, the system displays N/A.
- If an attribute is added to the record but its value is empty, an empty value is displayed.
- Clicking the Edit (pencil) button allows the user to modify the attribute value. If the attribute was not previously added to the record, saving a value will automatically create (add) the attribute for that record.
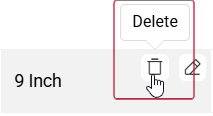
- Clicking the Delete (box) button removes the attribute value from the record. After deletion, the attribute is no longer associated with the record and will again appear as N/A.
This behavior allows users to manage attribute presence and values directly from the layout without navigating to a separate edit form.
Editing Restrictions
Some fields cannot be edited due to system constraints:
- Read-only fields - Fields that are system-generated or protected
- Permission restrictions - Fields you don't have permission to modify
The system will display appropriate error messages when editing is not allowed.
Deleting Records
Record deletion in AtroCore follows a two-stage process to prevent accidental data loss.
Soft Delete
When you delete a record, it's first moved to a "deleted" state:
- Select the record(s) you want to delete
- Choose
Deletefrom the actions menu - Confirm the deletion in the popup dialog
- The record is marked as deleted but remains in the database
Deleted records are hidden from normal views but can be restored if needed. The relationships with the deleted record are also preserved but hidden from normal views.
For information about where to find delete actions in the interface, see the Single Record Actions and Mass Actions sections.
While in a soft-deleted state, these records are not accessible through the standard record view and their detailed information remains unavailable until the record is restored.
Permanent Delete
To permanently remove records from the database:
- Navigate to the entity's list view
- Apply the "Deleted" filter to see deleted records (this is required - deleted records are hidden by default)
- Select the deleted record(s)
- Choose
Delete Permanentlyfrom the actions menu (either Single Record Actions or Mass Actions) - Confirm the permanent deletion
Permanently deleted records cannot be restored. All related relationships are also permanently removed from the database.
Automatic Deletion Settings
System administrators can configure automatic deletion settings for each entity type:
- Permanent deletion period - Controls how many days after soft deletion a record is automatically permanently deleted
- Auto-delete period - Controls how many days after creation a record is automatically deleted from the system. Is used only in Archive type entities.
These settings help manage database storage and ensure old records are cleaned up automatically. The specific settings for each entity can be configured by administrators.
For information about configuring deletion settings for specific entities, see Entity Management in the Administration section.
Deletion Restrictions
Some records cannot be deleted due to system constraints:
- Records with active relationships - Records linked to other entities may be protected
- System or default records - Core system entities and records marked as default values cannot be deleted (e.g., system locale, default measure units)
- Admin-configured restrictions - Administrators can configure additional deletion restrictions for specific entities or record types
The system will display appropriate error messages when deletion is not allowed.
Restoring Records
AtroCore allows you to restore soft-deleted records back to their active state. This feature provides a safety net for recovering accidentally deleted records before they are permanently removed from the system.
To restore a deleted record:
- Navigate to the entity's list view
- Apply the "Deleted" filter to see deleted records (this is required - deleted records are hidden by default)
- Select the deleted record(s)
- Choose
Restorefrom the actions menu (either Single Record Actions or Mass Actions) - Confirm the restoration in the popup dialog
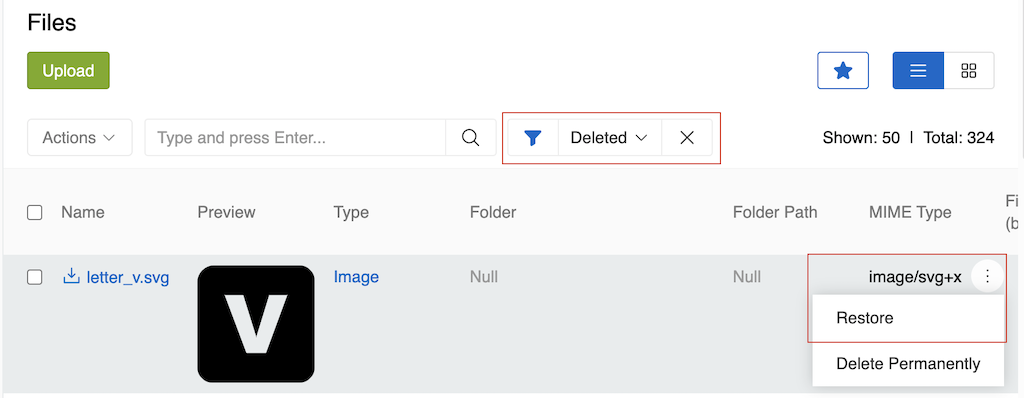
The record will be restored to its active state and will appear in normal views again. All relationships with the restored record will also be restored and visible.
Single Record Actions
Records can be managed through various actions available across different views. These actions allow you to perform operations on individual records:
-
View - Opens the record's detail view where you can see all information about the record, its relationships, and related data. This is useful for reviewing record details without making changes. Available from list view.
-
Edit - Opens the record for editing, allowing you to modify field values, update relationships, and change record properties. This is the primary way to update existing records. For detailed information about editing processes, see the Editing Records section. Available from list view, detail view.
-
Delete - Removes the record from the system. Records are first soft-deleted (marked as deleted but retained in the database) and can be permanently deleted later if needed. For detailed information about the deletion process, see the Deleting Records section. Available from list view, detail view.
-
Duplicate - Creates a copy of the record with all values copied from the original. This action is available from the detail view. You'll need to modify unique fields (like Name and Code) before saving the duplicate. For information about creating records, see the Creating Records section. Available from detail view.
-
Bookmark/Unbookmark - Adds or removes the record from your bookmarks for quick access. Bookmarked records appear in your bookmarks panel for easy navigation. Available from list view and from detail view as a separate button.
-
Additional Actions - Some other actions are added by modules and may be available depending on your system configuration and user permissions (e.g., Generate PDF). Options available from list view and detail view may vary.
For information about how to access these actions in the interface, see the Single Record Actions section.
Mass Actions
AtroCore provides powerful mass actions for managing multiple records simultaneously. These operations allow you to perform actions on multiple selected records at once, significantly improving efficiency when working with large datasets.
Available mass actions include mass update, mass delete, mass export, and mass relationship management. These are particularly useful for bulk data updates, data cleanup, and relationship management. The available actions can be extended through system configuration and additional modules.
For detailed information about mass actions, step-by-step procedures, and advanced features, see the Mass Actions documentation.
Linking and Unlinking Related Records
AtroCore uses relationships to connect records across different entities. Managing these relationships is a key aspect of record management.
Since relationships are two-sided, you can manage them (add, remove) from either side of the relationship. For example, if you have a Product linked to a Classification, you can unlink them from either the Product's detail view or the Classification's detail view.
Adding Relations
You can link records in two ways depending on the field type:
Link Fields
For single reference fields (Link type), simply fill in the field value:
- Open the record's detail view
- Navigate to the Link field
- Use the field's selection interface to choose the related record
Multiple Link Fields
For multiple reference fields (Multiple Link type), use the related entity panel:
- Open the record's detail view
- Navigate to the related entity panel
- Click the
+button to create a new related record - Or click
Selectto link existing records
For detailed information about small list views and related entity panels, see the Small List View section.
Removing Relations
Link Fields
To unlink a single reference:
- Open the record's detail view
- Navigate to the Link field
- Clear the field value or select a different record
Multiple Link Fields
To unlink related records:
- Navigate to the related entity panel in the detail view
- Select the record you want to unlink
- Choose
Unlinkfrom the single record actions menu - Confirm the action
Warning: Unlinking records only removes the relationship, not the actual records. The unlinked records remain in the system.