Microsoft 365 Connector module integrates AtroCore with Microsoft 365 (e.g. SharePoints, E-Mails, Calenders) and other Microsoft products and services.
Integration with SharePoint
Register the application
In order to set up PIM integration with SharePoint, you must first register your application. To do this, follow these steps:
1) Log in to the https://entra.microsoft.com/ page with administrator rights.
2) In the Applications section, select App registration and click New registration.
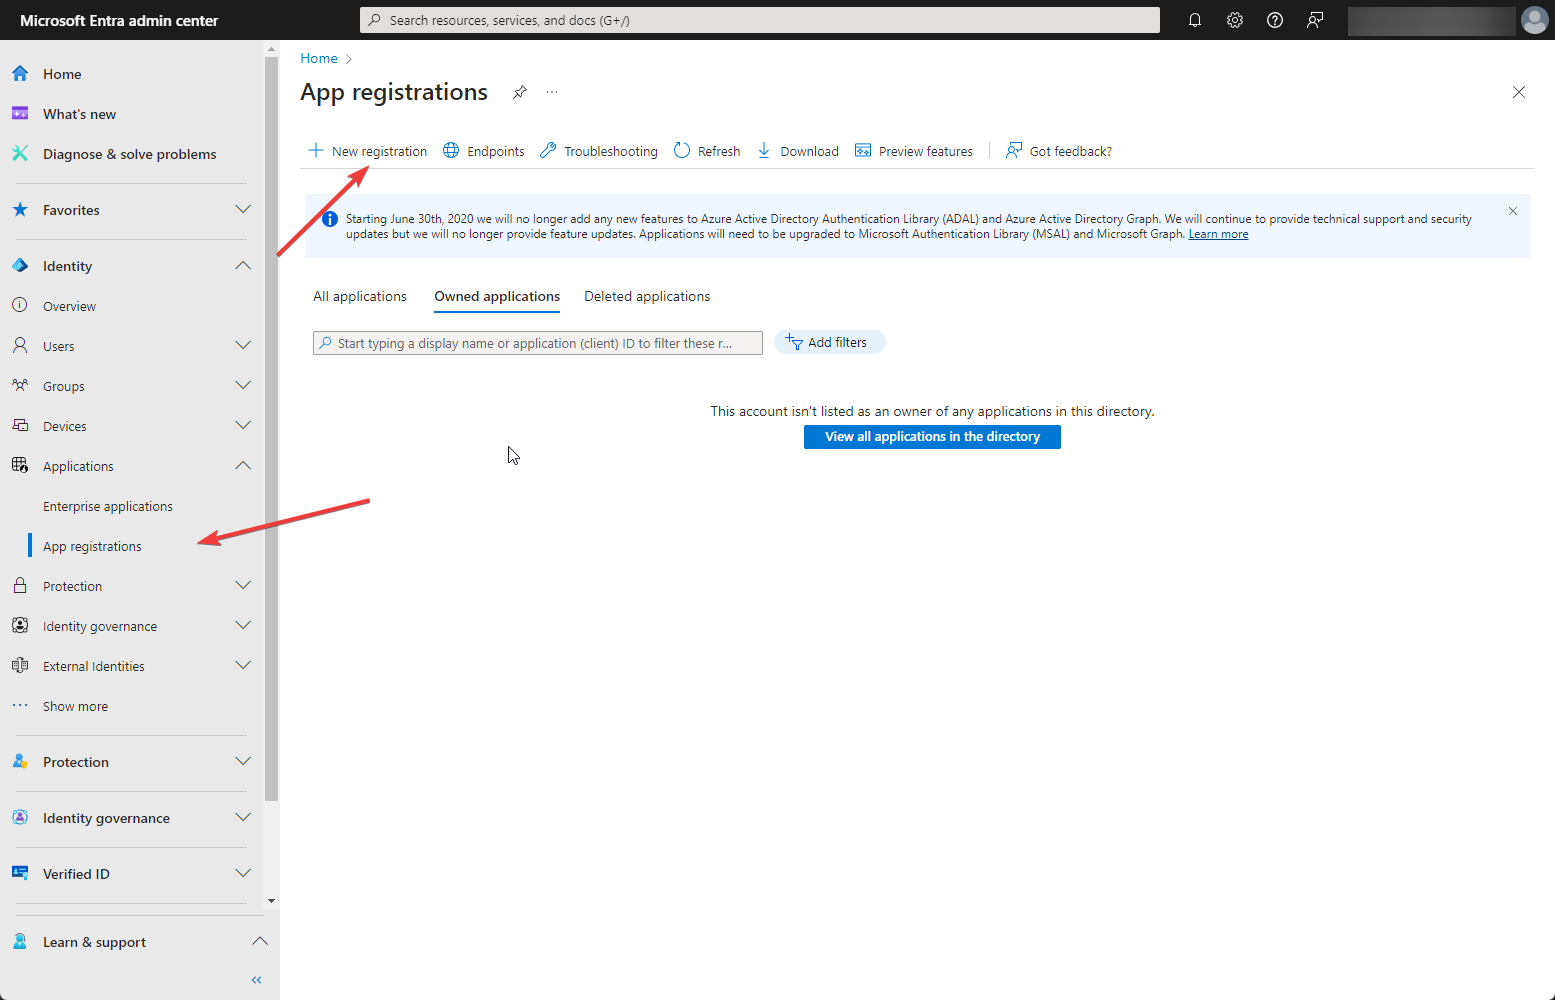
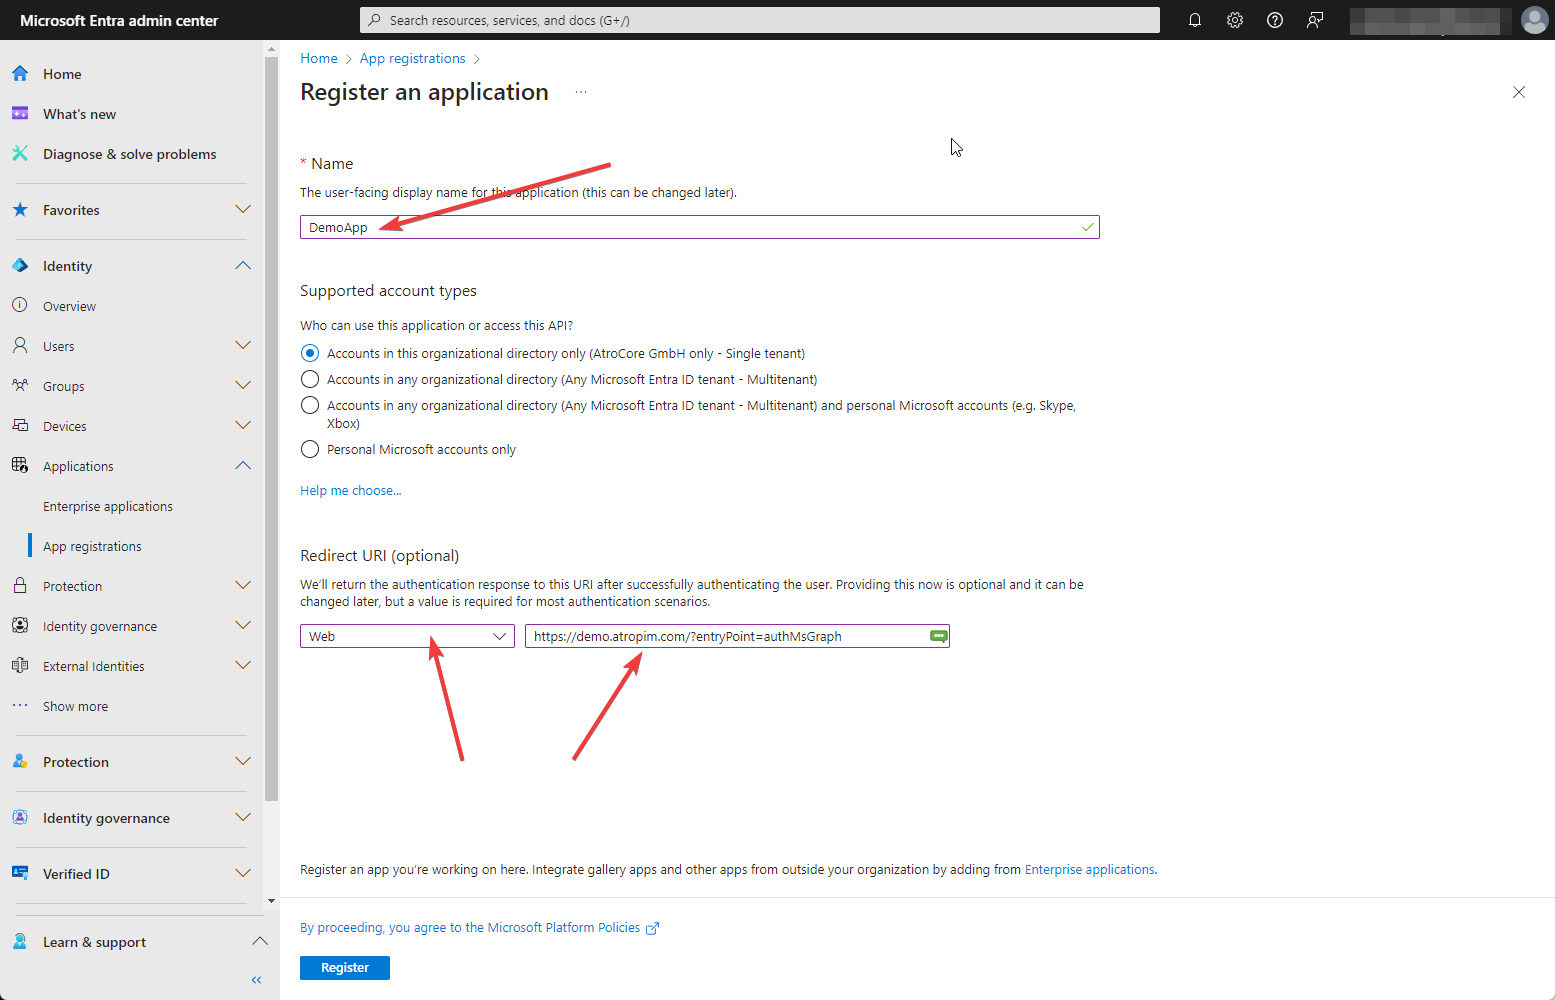
3) In the appeared window, enter all the necessary data. Enter the display name for your app in the Name field. You can change it later. Select "Accounts in this organizational directory only" as Supported account type.
Next, you need to set the Redirect URI. Select Web as a platform and specify the domain of your project in the required format (authMsGraph should be at the end. Example: https://demo.atropim.com/?entryPoint=authMsGraph). Then click on Register button. Now your app is created.
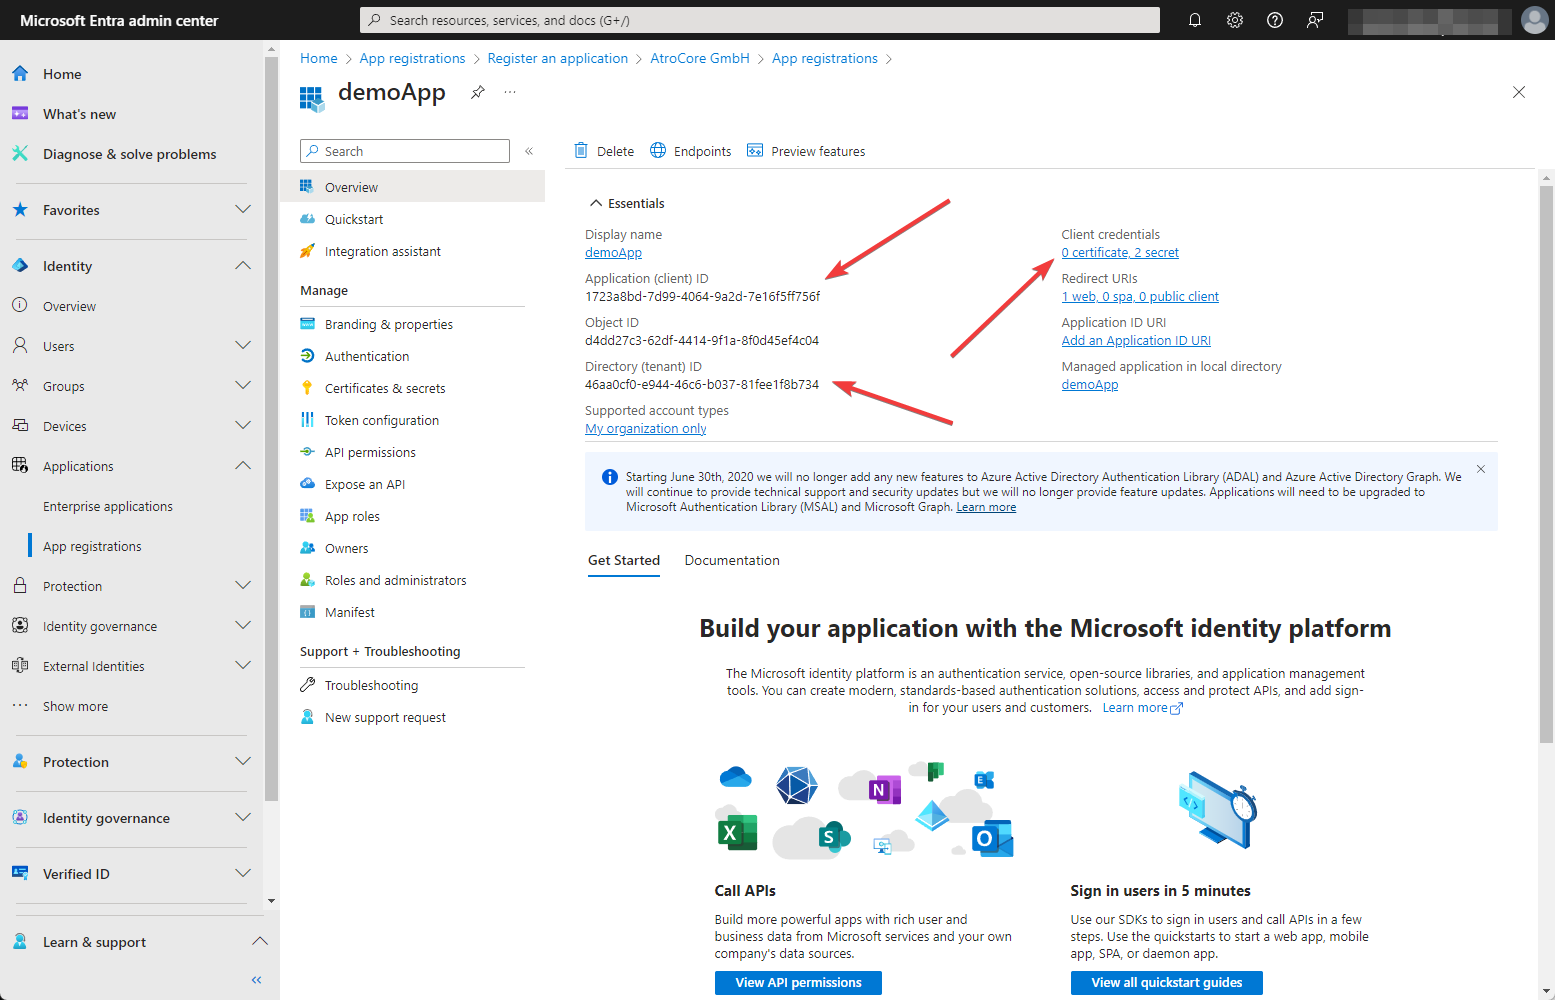
Go to Overview panel to see parameters of your application. For integration with PIM you need Client ID, Directory (tenant) ID and Client credentials.
4) To create customer credentials, click Add a certificate or secret. The following page will open
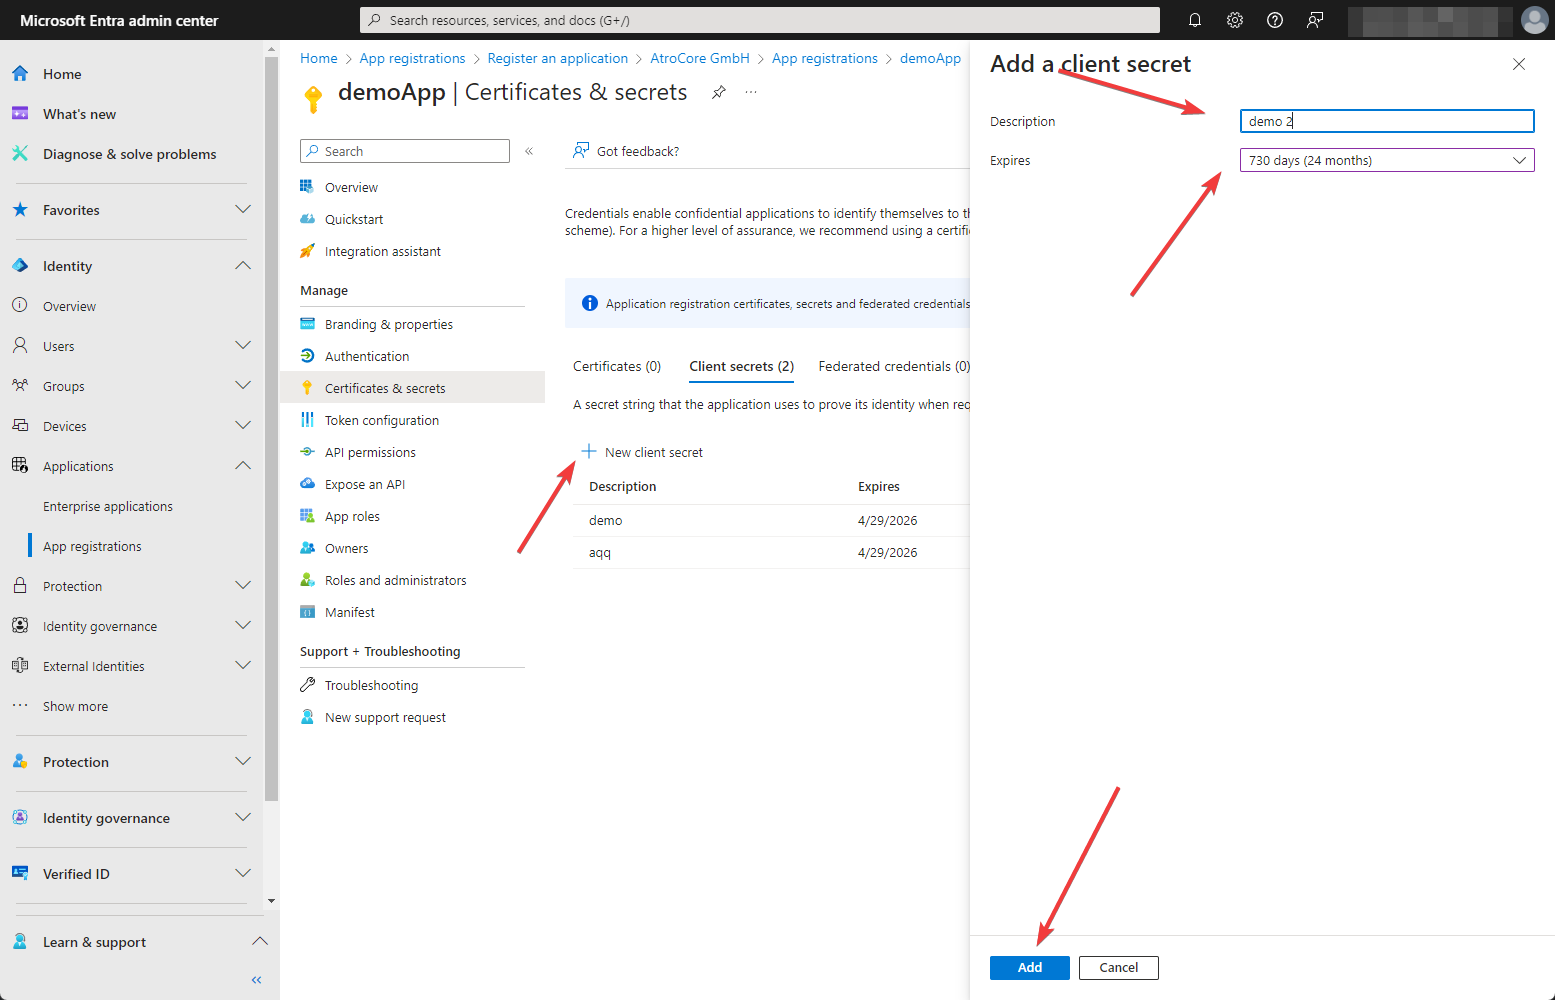
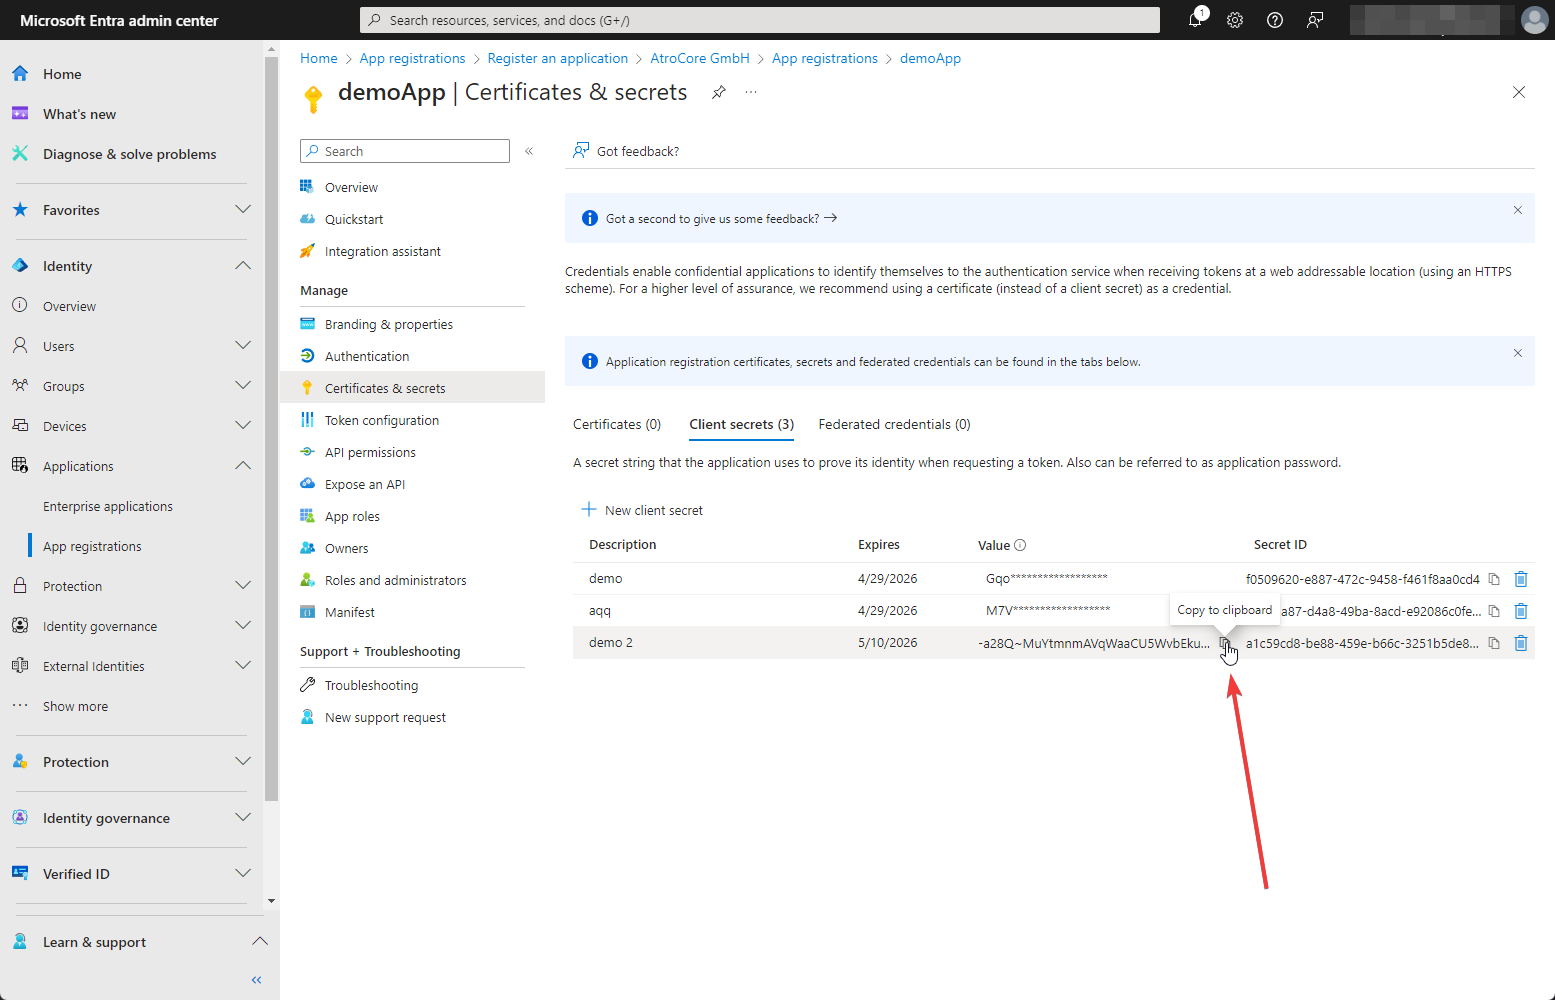
Click on New client secret, enter the description of your secret and select expiration period. It is better to choose the longest possible existence period. Now you can copy the Client secret. This can only be done immediately after creation. Later, this option will disappear.
5) After the application is created, you need to give it the necessary permissions. Go to API permissions and click on Add a permission -> Microsoft Graph -> Application permissions.
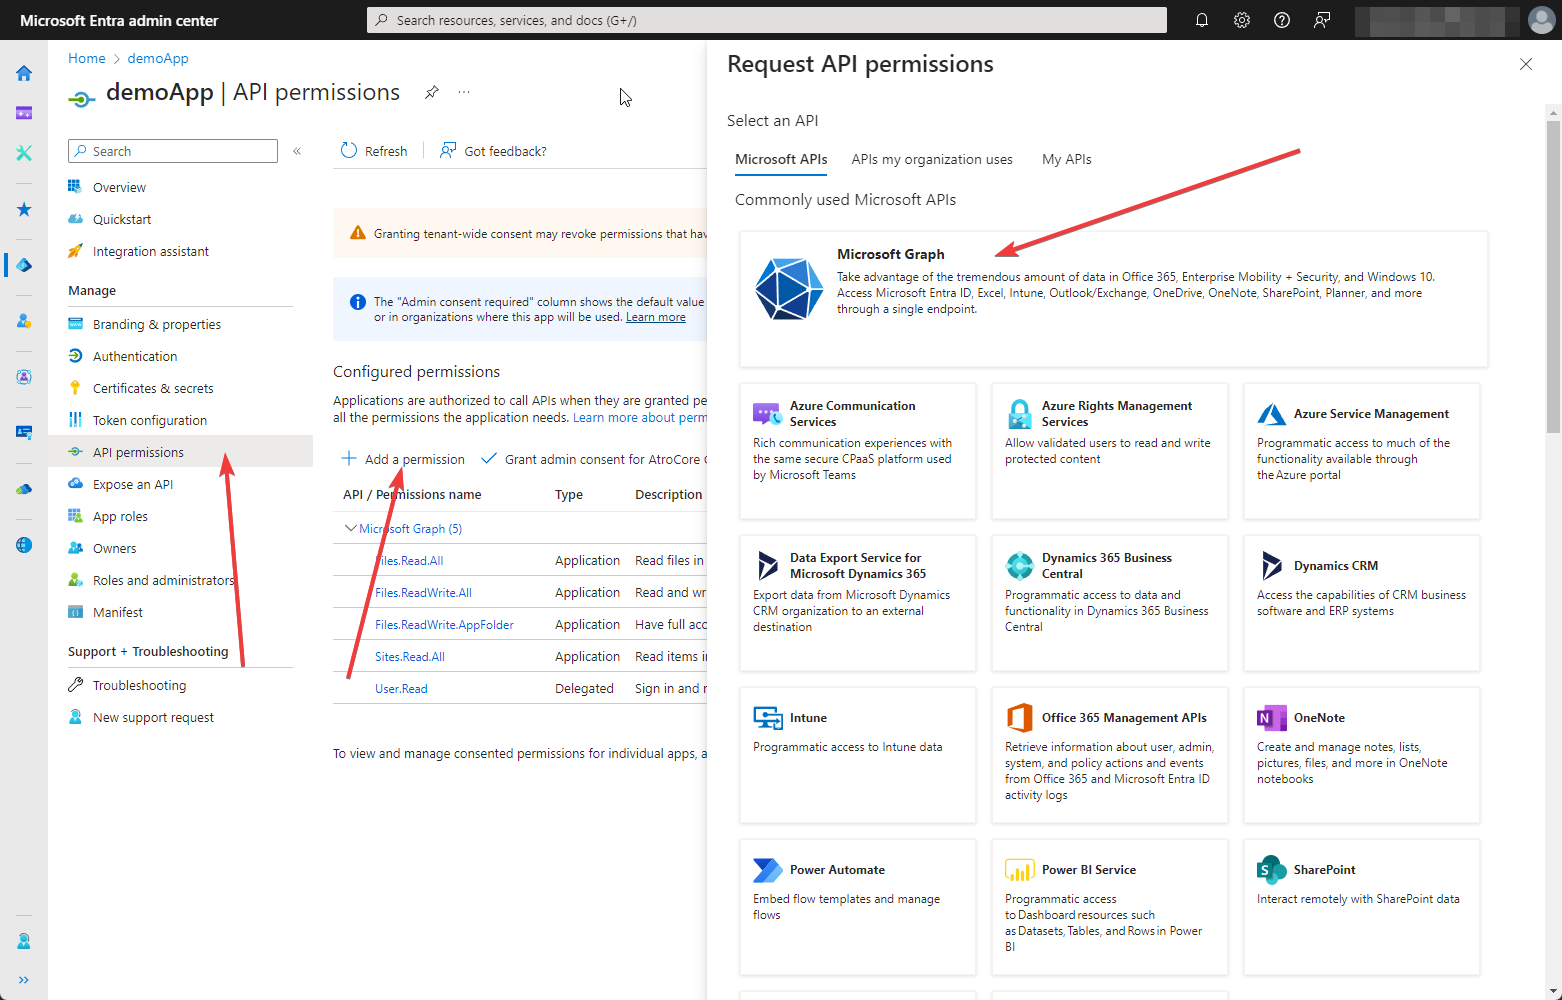
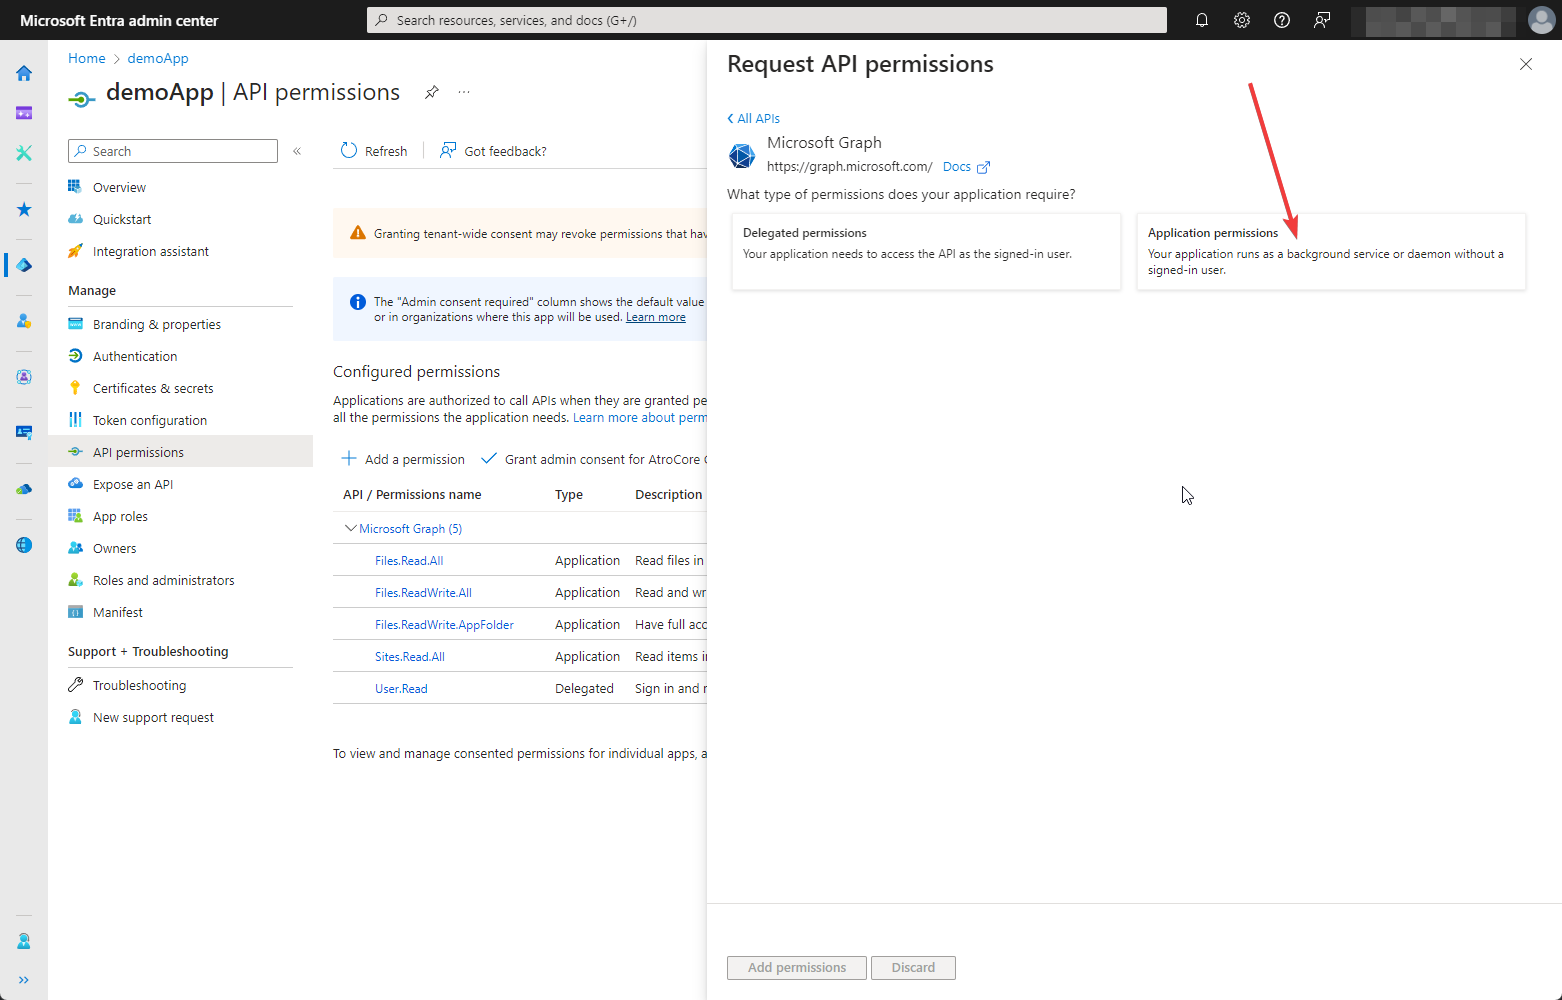
You need to add permissions to read sites, as well as permissions to see and edit files and folders. Select the appropriate checkboxes in the Request API permissions tab and click on Add permissions.
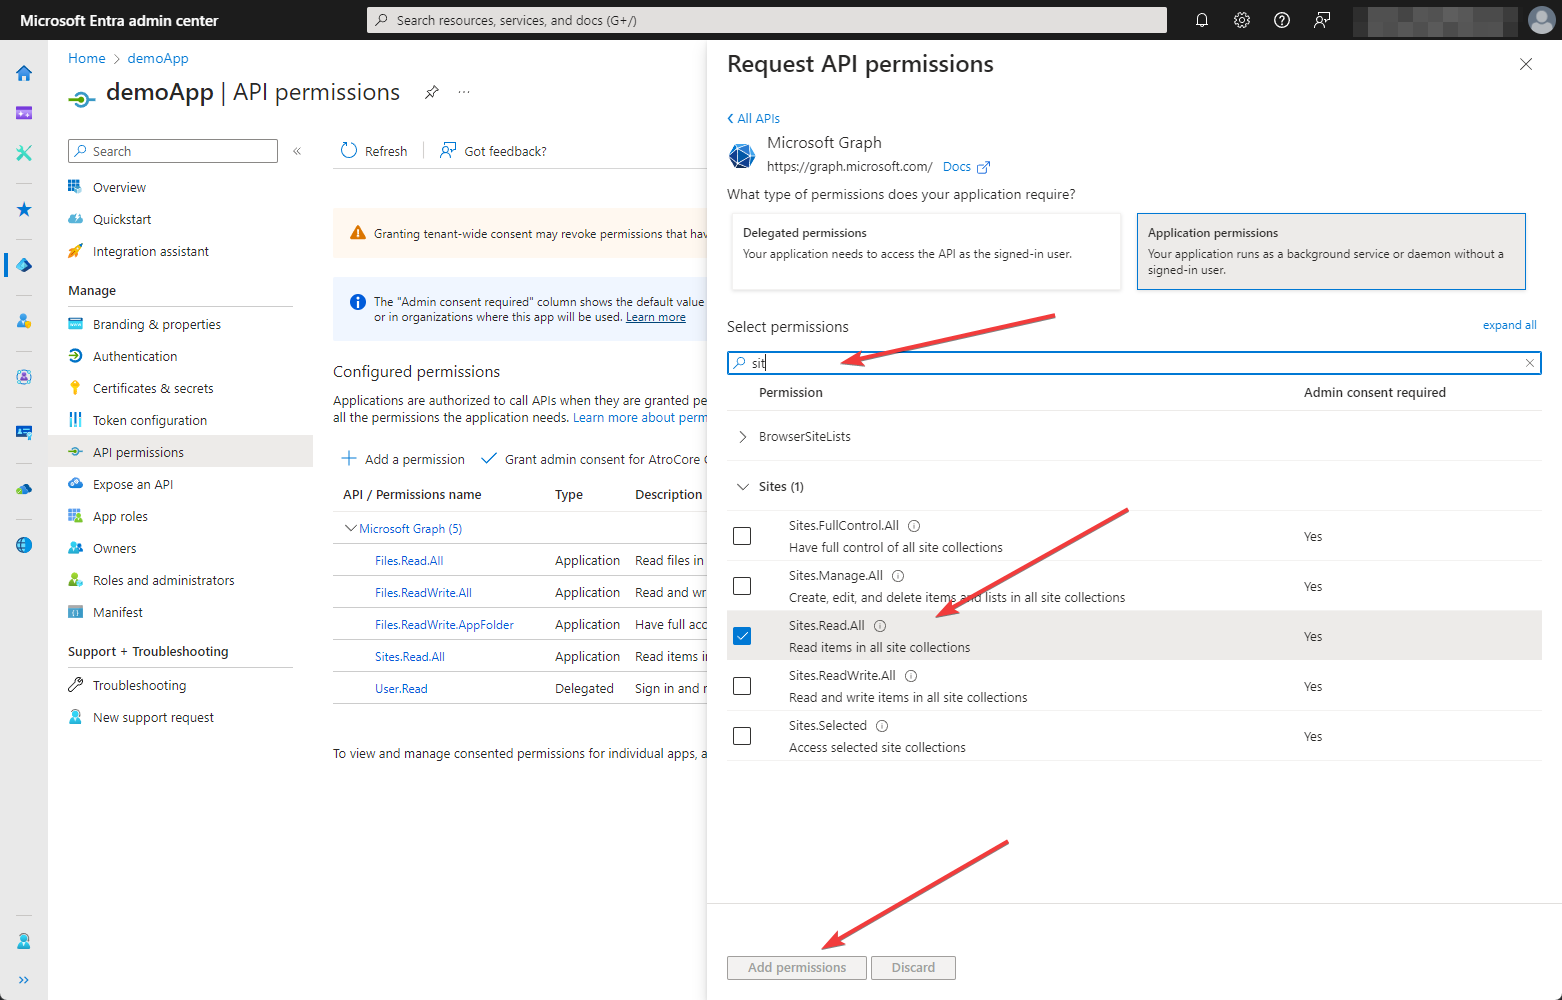
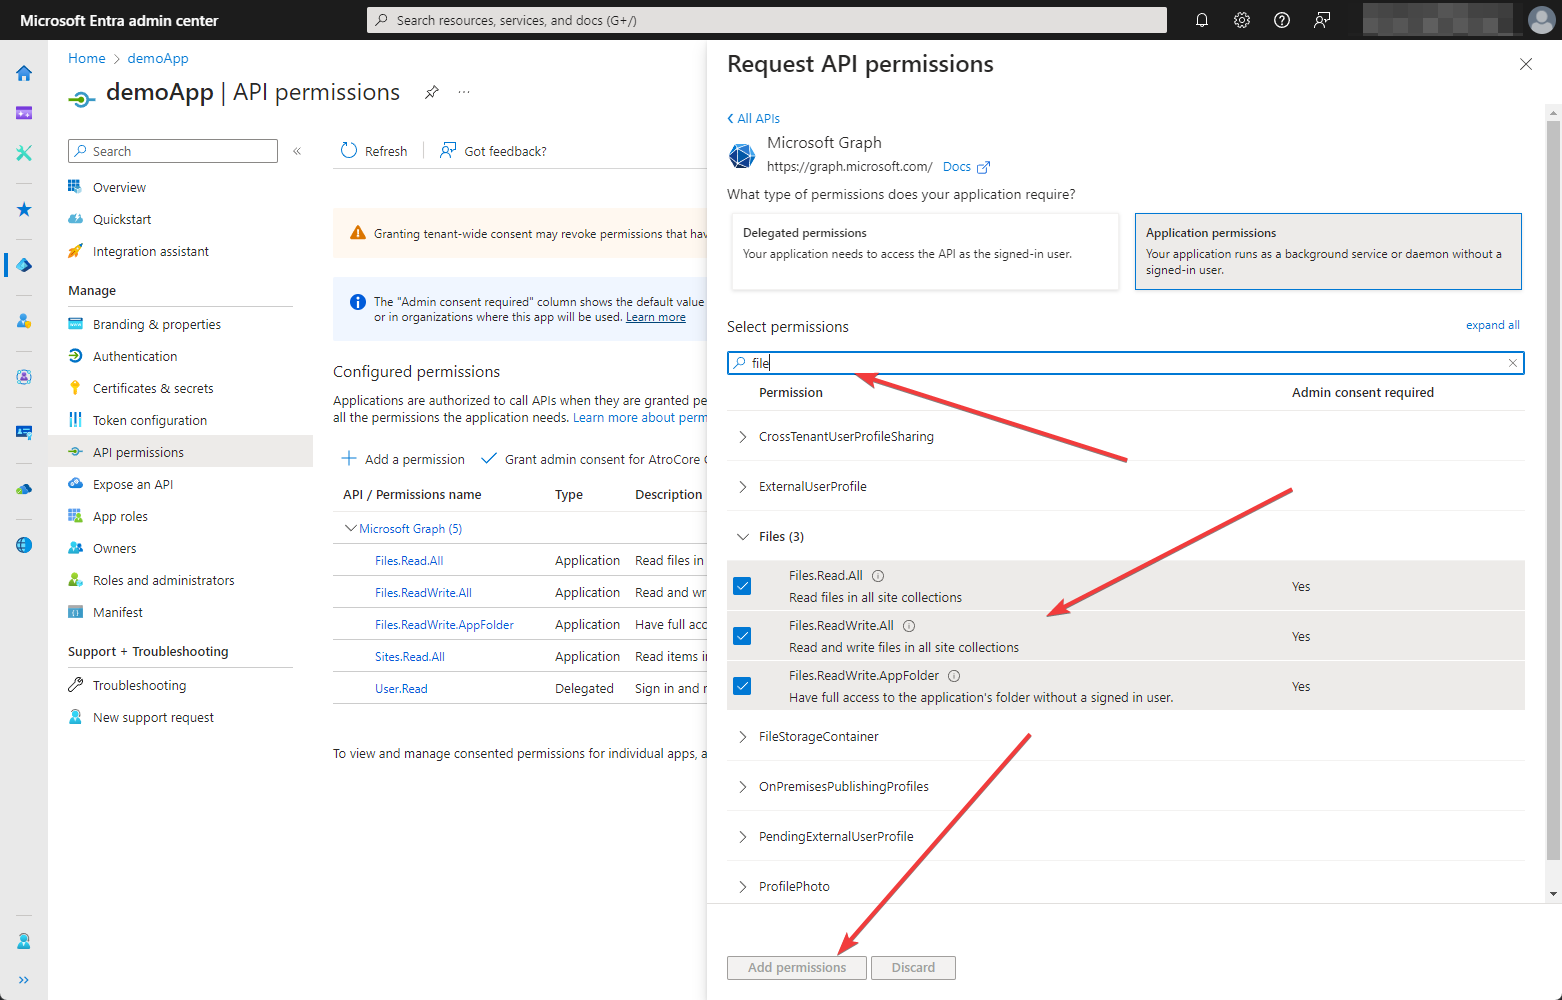
The selected options will be added to your Configuration permissions. To make them active, click on Grant admin consent button
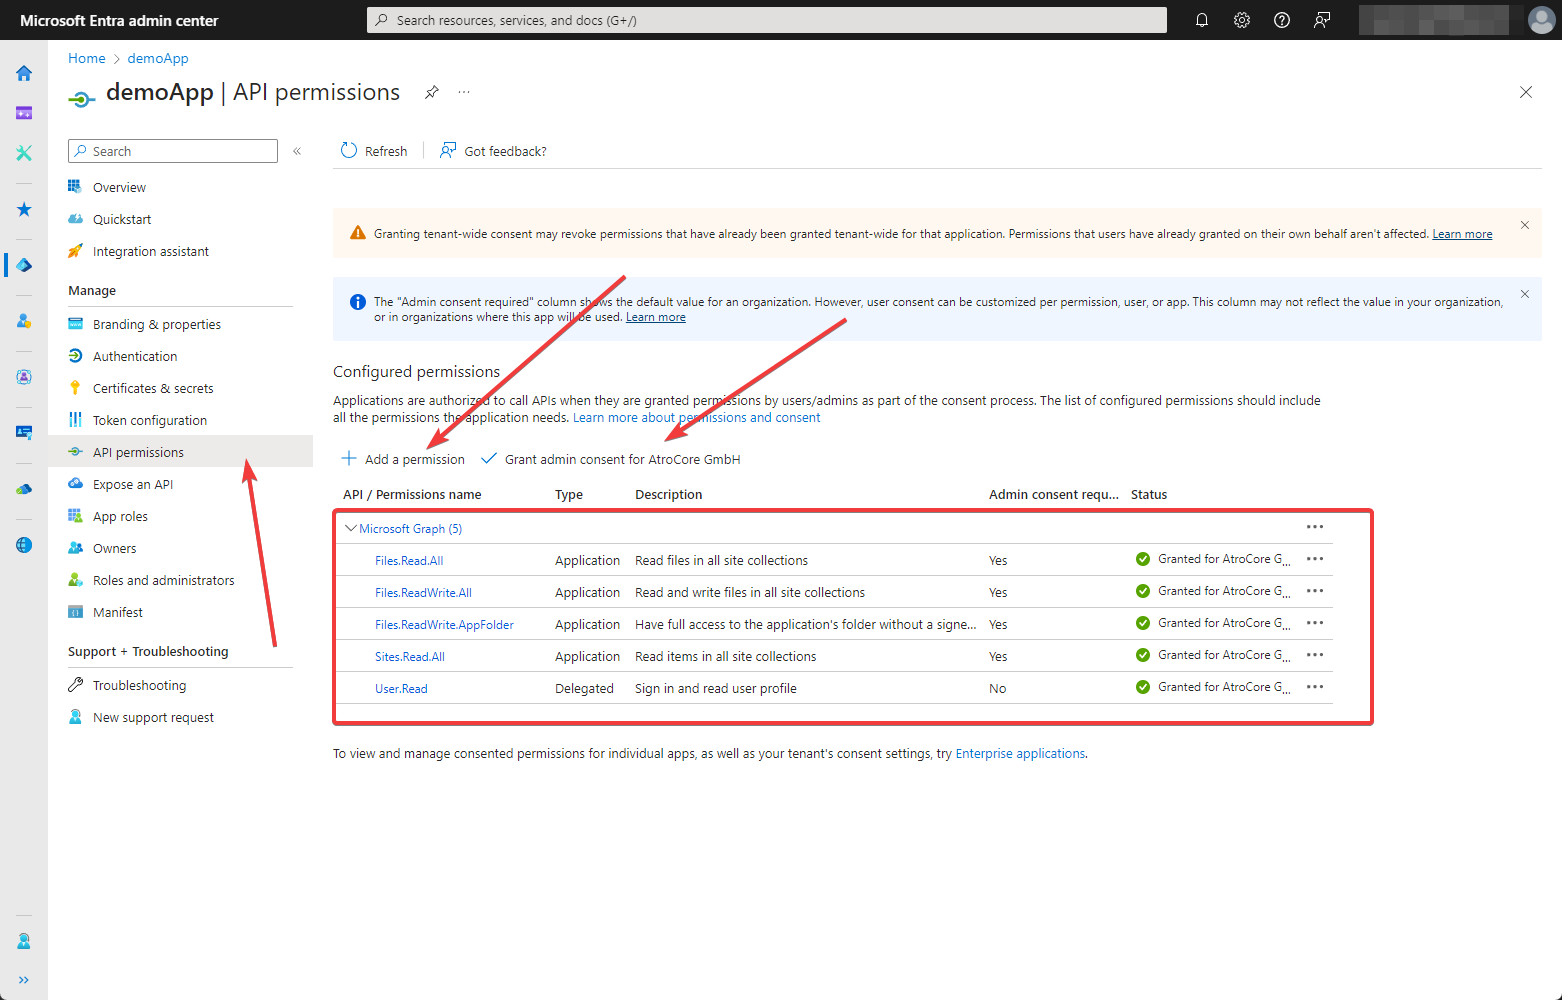
This completes the creation and configuration of the application.
Create connection in PIM
To provide the integration with PIM you need to create a connection of type Microsoft Graph Authentication. For this go to Administration > Connections and click on Create connection button. The following page will appear
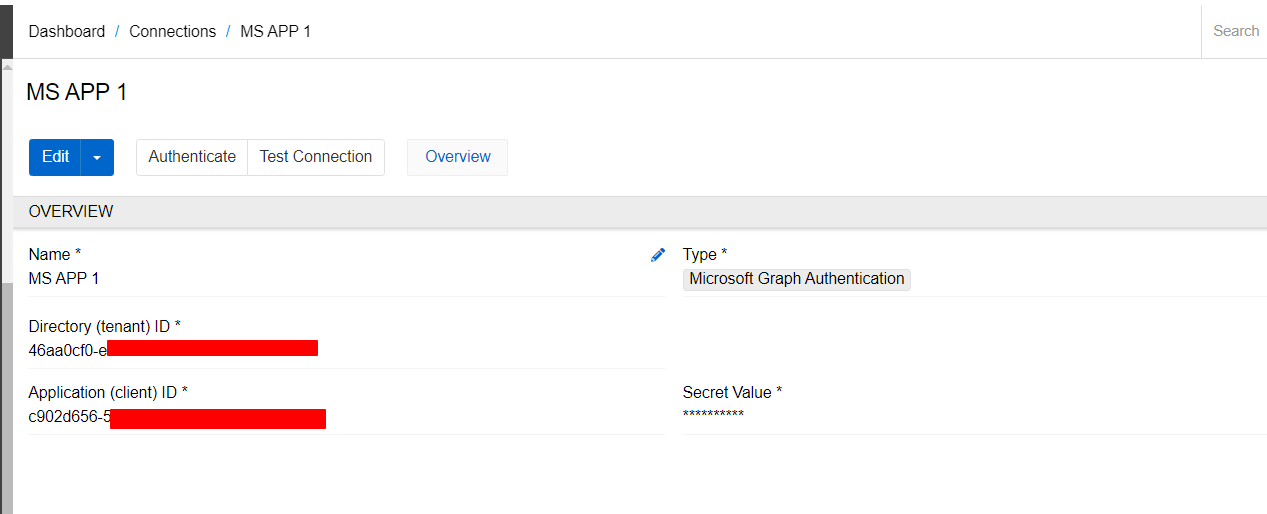
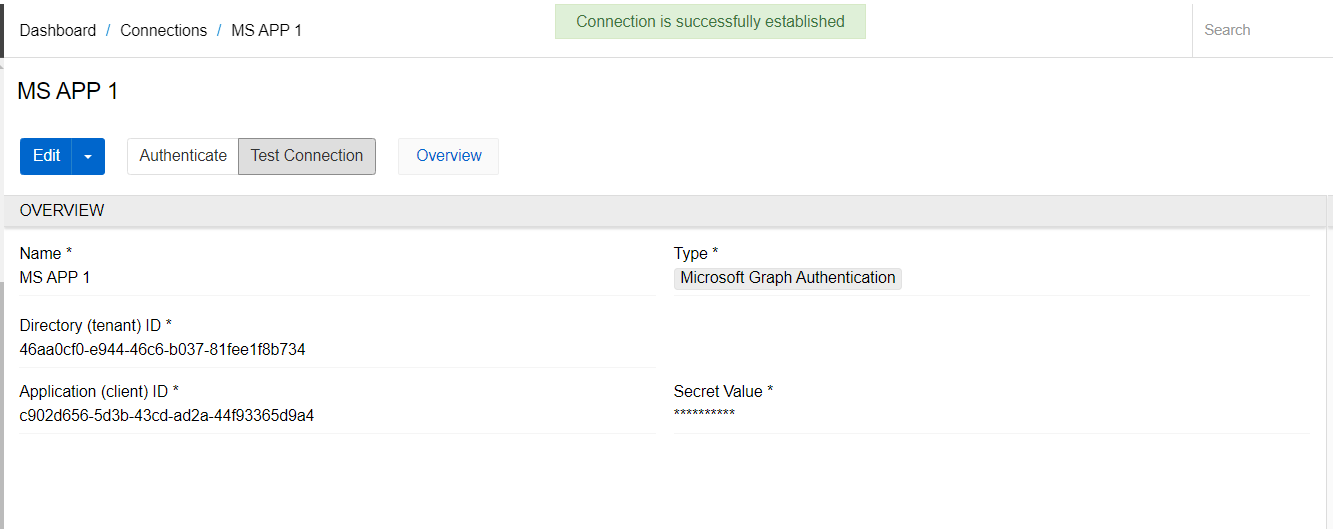
Enter the name of the connection and select type "Microsoft Graph Authentication". Directory ID, Application ID and Secret value should be taken from your App Essentials. Save your connection and click on Authenticate button. You'll be redirected to the Microsoft logging page, where you'll need to select an account with administrator rights and enter your login and password. After that, you will be returned to the connection page. Click on Test connection to check if it was configured properly. If you see message "Connection is successfully established", the integration has been successfully configured.
Storage creation
In order to access the data on the the SharePoint from the PIM, you need to create a Storage of type 'Microsoft SharePoint'. To do this, go to Administration and select Storages in File management section. Click on Create Storage button.
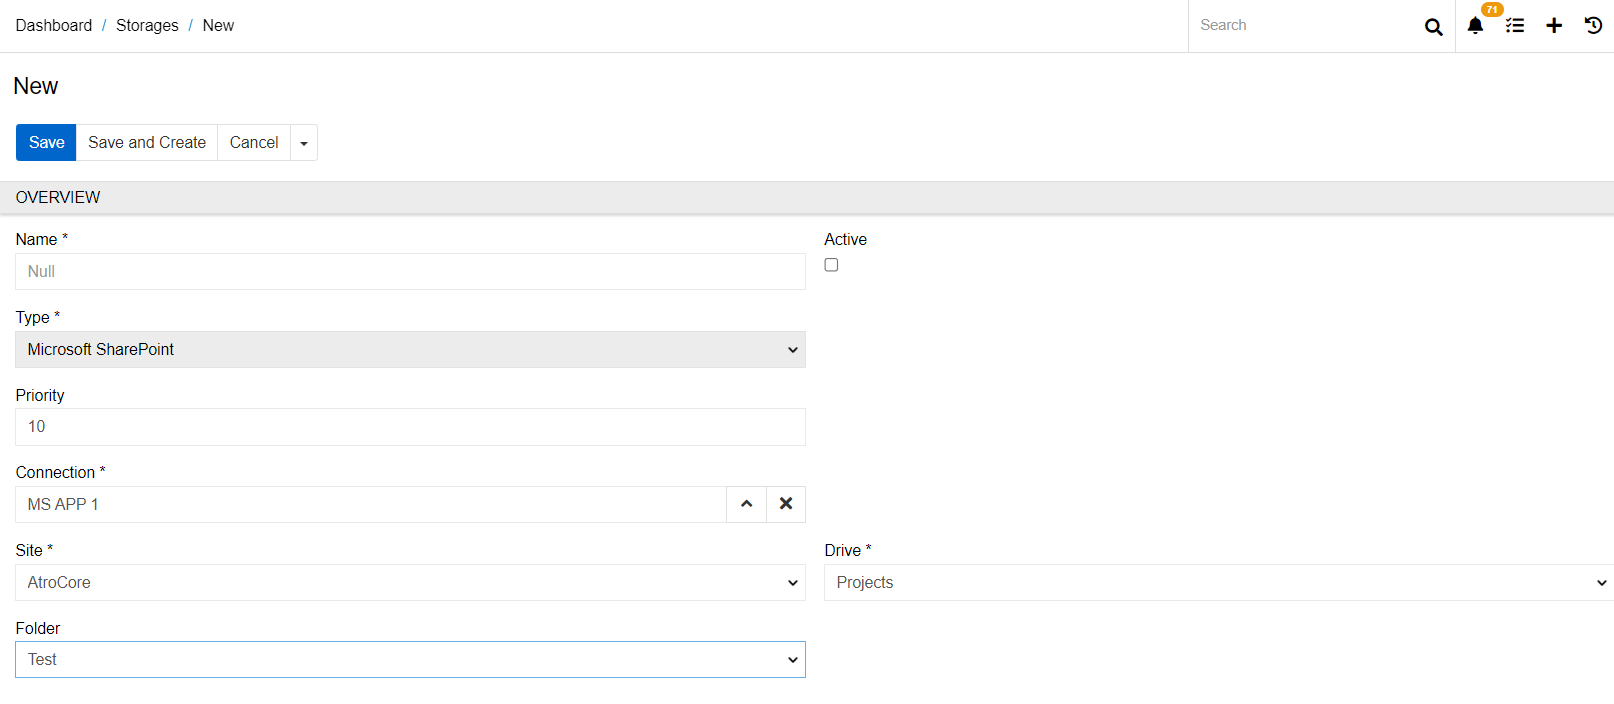
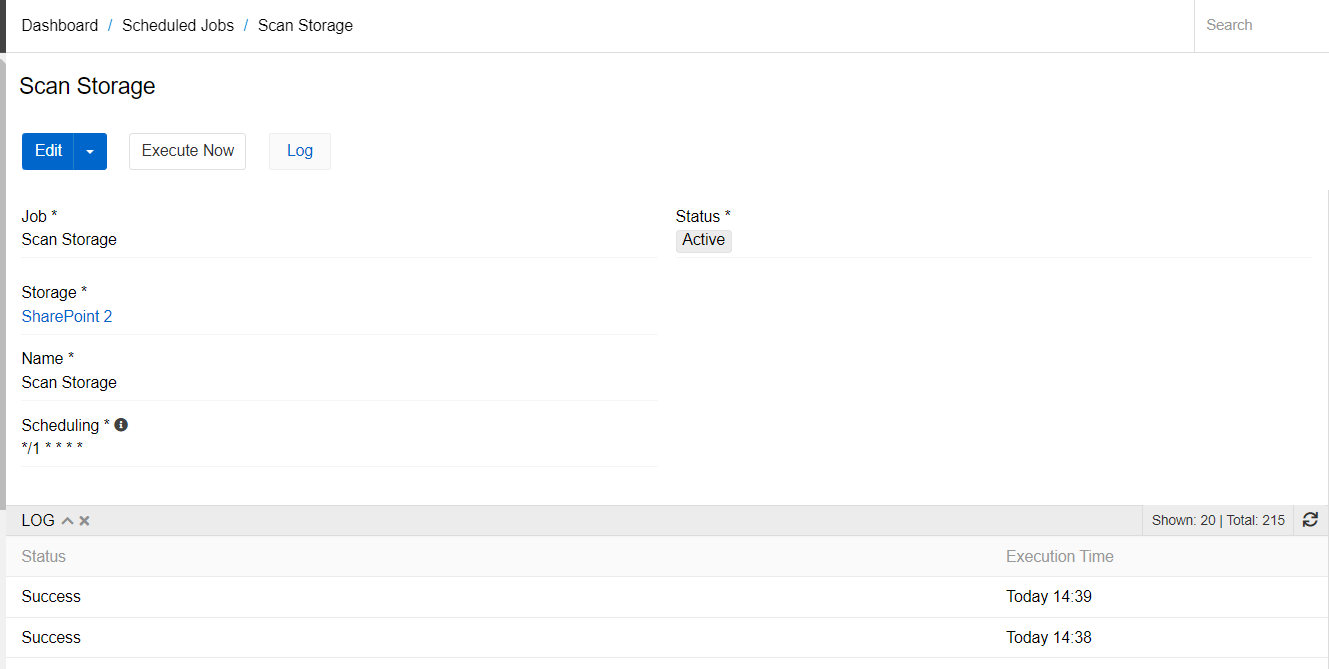
Enter the name of your storage, select type 'Microsoft SharePoint' and select connection you created in previous point. Specify the path to your folder. To do this, select the required data in fields Sit, Drive, and Folder. Click on Save button to save your storage. Now all files that you add (change or delete) to this storage will be automatically synchronized with SharePoint. Synchronization also works in the opposite direction. To synchronize data from SharePoint to PIM, you need to click the Scan button in the storage. You can also set up regular synchronization with SharePoint using a scheduled job of type 'Scan Storage'.
