Table of contents
Files
All the capabilities for efficiently storing, organizing, managing, retrieving and distributing files are available to the users as soon as they install the system. With the help of PIM, you can store files of various types, manage them, link them to products and other entities, import and export them. We have implemented the File first concept, which allows the user to add, delete and modify files and folders both inside the system and externally - directly on the server.
The PIM file system includes the following entities:
- Storage - a place where a file is physically stored.
- Folder - the folder to which the file belongs. One file can exist in only one folder
- File - a document that can be used as an attachment to products and other entities.
Storages
This is the location where the file is stored. Each file can have only one Storage, while many files and folders can be stored in the same Storage. By default, only Local (Linux) Storage is available to the user. Other types are available after installing paid modules. For example, MS SharePoint Storage is provided with the Microsoft 365 Connection module. The Base Storage exists in the system by default. All newly created folders and files are placed in it if no other Storage is specified. Files and folders cannot be moved from one Storage to another after creation. The Storage contains the following fields:
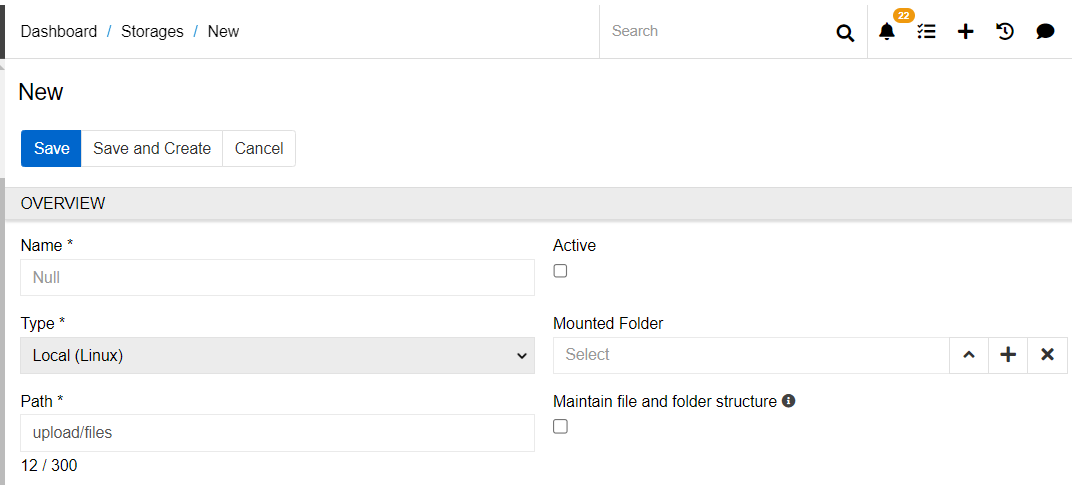
- Name - the name of the Storage
- Active - to be able to work with a Storage, it must be active. If the it is inactive, you can not add a new folder or file to it. Files that were added before deactivation will not be deleted and will remain attached to the product, but will not be available for downloading or viewing.
- Type - the type of the Storage.
- Mounted Folder - the root folder of the Storage. All folders and files that need to be located in this Storage should be created inside this folder (or its child records).
- Path - the actual path on the server where the files will be stored. The path of two Storages cannot be the same. But one Storage path can be included in another.
- Maintain file and folder structure - a checkbox that allows you to synchronize the structure of the Storage in PIM with the structure on the server. If the checkbox is activated, all folders and files will be stored on the server in the same path as specified in the pim. The value of the checkbox cannot be changed after the Storage is created.
The Storage page also contains panels with files and folders. The folder specified as Mounted Folder is present in the folder panel by default.
Folder
Files that are uploaded to a PIM without a specified Folder are placed in the root of the base Storage by default. Folders allow you to organize the structure of a Storage by dividing files into certain categories. This is a hierarchical entity, you can see the folder tree in the left menu from the Folder or File entity.
To filter files by their belonging to a particular Folder, you need to go to the File entity and select the desired Folder in the tree. To upload a file to any other Storages than the Base one, you need to specify the Folder that is situated in the desired Storage. Since the file entity contains the Folder field and does not contain the Storage field.
You can create a new follower from a Storage or from the Folder entity itself. To do this, go to the Administration > Folders and click the Create Folder button. You will see a window for creating a new folder containing the following fields:
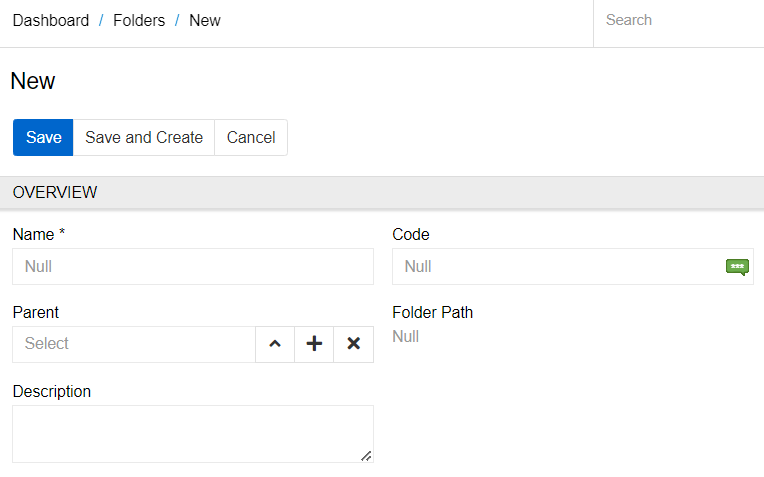
- Name - the name of the Folder
- Code - the code of the Folder
- Parent - a link to the parent Folder. Specify here the root folder or another folder of the Storage if you want to create a folder inside it
- Folder Path - the folder tree that forms the path to this Folder. The field will be filled in automatically after saving the changes
- Description - description of the Folder
Files
All Files in PIM can be divided into types. And you can create variants of these types and validation rules for them yourself. The type field is optional. One File can have only one type. By default, the following types are added to PIM: Presentation, Graphics, Archive, Video, Audio, Icon, Image, Spreadsheet, Document and File. You can create new types, change the validation rules or priority for existing types, or delete them.
To create a new file type, go to Administration > File Types and click the Create File Type button
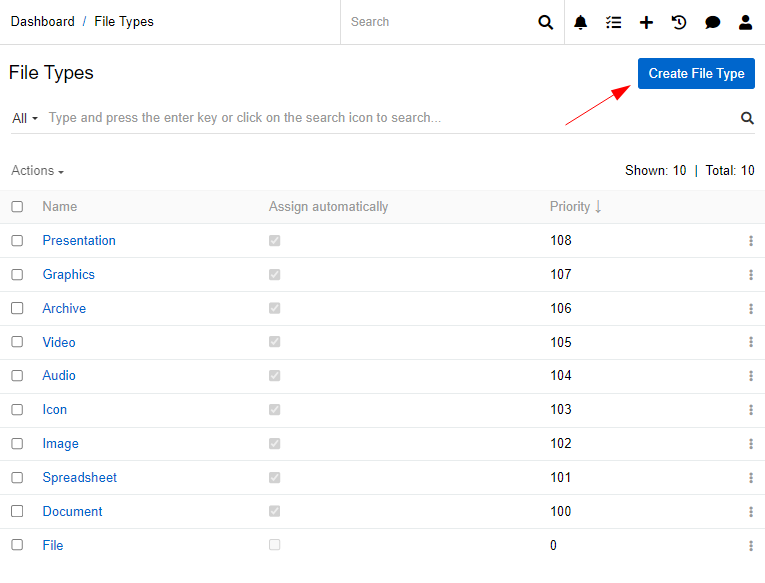
- Name - the name of the File Type
- Assign automatically - select this checkbox if you want the File Type to be assigned automatically if it meets the validation rules
- Priority - this field determines the order in which the File Type is assigned. If a File meets several validation rules, the one with the highest priority will be assigned automatically.
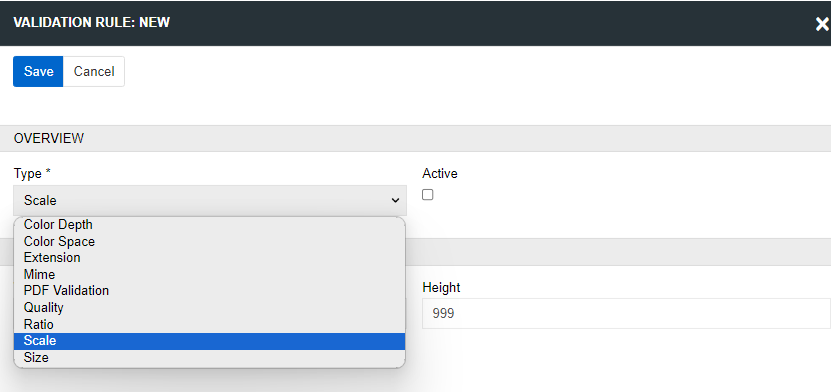
To add validation rules to a type, click the + button in the corresponding panel. Select the validation type and set the necessary parameters.
The type can be assigned to the file automatically (if this option is set for it), set when the file is uploaded, or changed after uploading.
Setting the allowed file types
You can specify the valid file types for fields (including the fields of type link multiple) and attributes of the File type. If you do so, the user will only be able to upload certain file types to the required field or attribute.
To set the allowed file types, go to the Administration / Entities, select the desired entity, and click Fields -> files
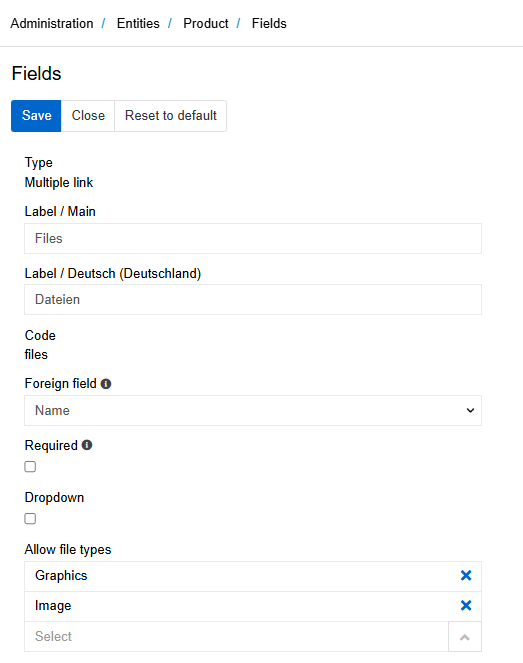
If the field value is not specified, you can link any file type to the record.
Uploading a File to PIM
There are several ways to upload a file to the system in PIM:
- via the Upload button in the File entity, or any other linked entity
- via URL
- through an import feed
Create a File using the Upload button
In order to upload a new file to the system, open the File entity and click the Upload button
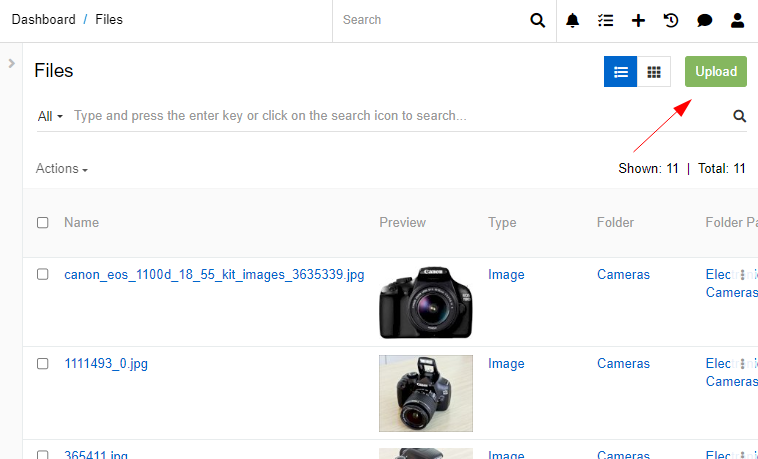
The window for uploading a File opens. You can upload one or more Files with the specified parameters at the same time. If necessary, select the File Type and the Folder to which you want to upload. If these fields are not specified, the File will be uploaded to the root of the Base Storage, and the type will be assigned automatically - the one with the highest priority of those for which the validation rules are being met. These parameters can be changed later after the File is uploaded. In the window that opens, click the Upload button and select the Files you want to add to the system.
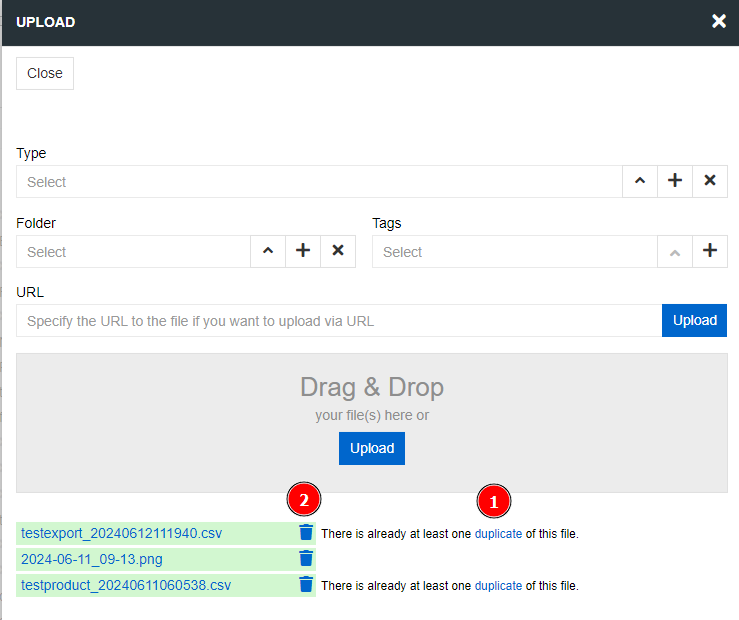
If a File with the selected name already exists in the system, you will see a corresponding message (1). You can immediately delete the uploaded File by clicking on the trash icon (2). The same Folder cannot contain Files and Folders with the same name. If you try to upload the same File, you will get an error message.
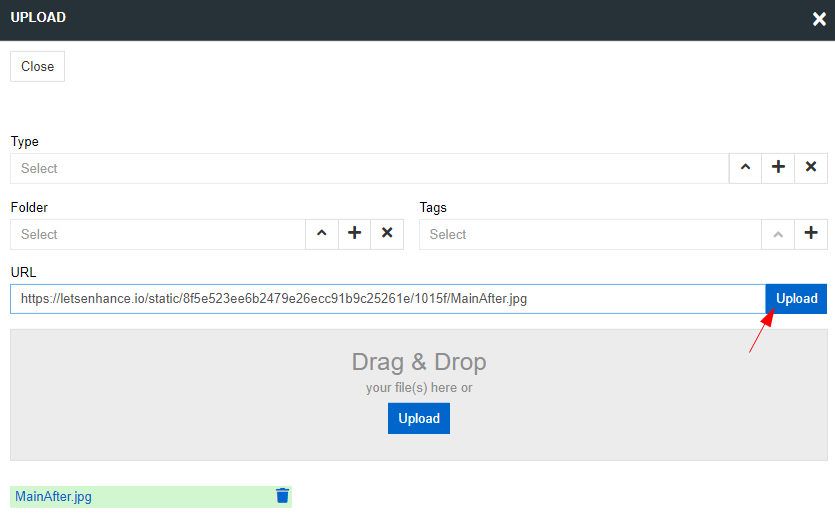
Upload a file via the link
To upload a file from the user interface using a URL, click the Upload button in the File entity, paste the link into the appropriate field, and click Upload.
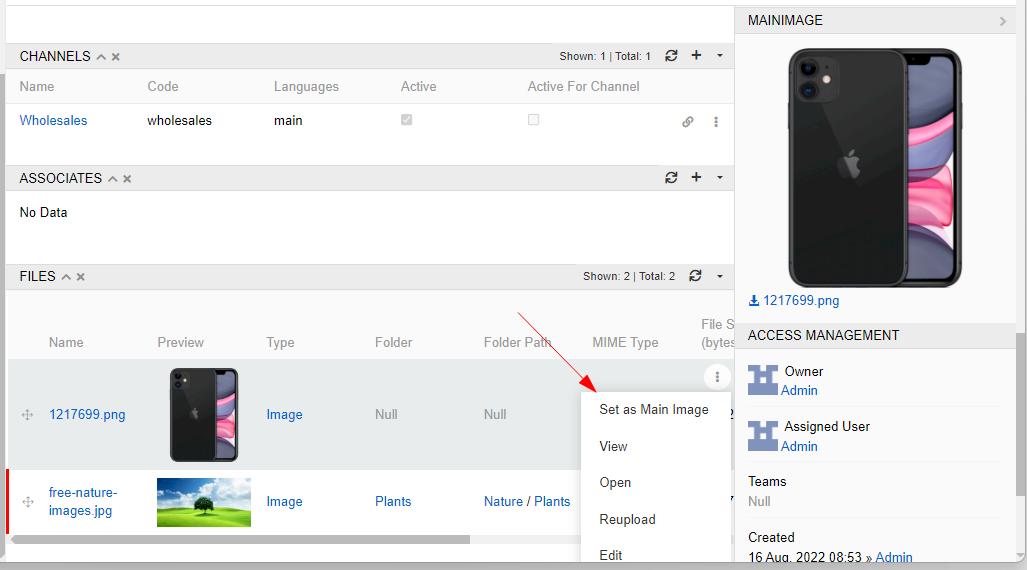
The File entity is related to the Product entity by a many-to-many relationship. This means that one Product can have many Files and vice versa. To add a File to a Product, go to the Product you need and in the Files panel, click the Upload button to upload a new File or Select to add files that already exist in the system. For a file with an image type, you can specify the Main image option. Only one Product File can be selected as the main image.
For a file with an image type, you can specify the Main image option. Only one Product File can be selected as the main image.
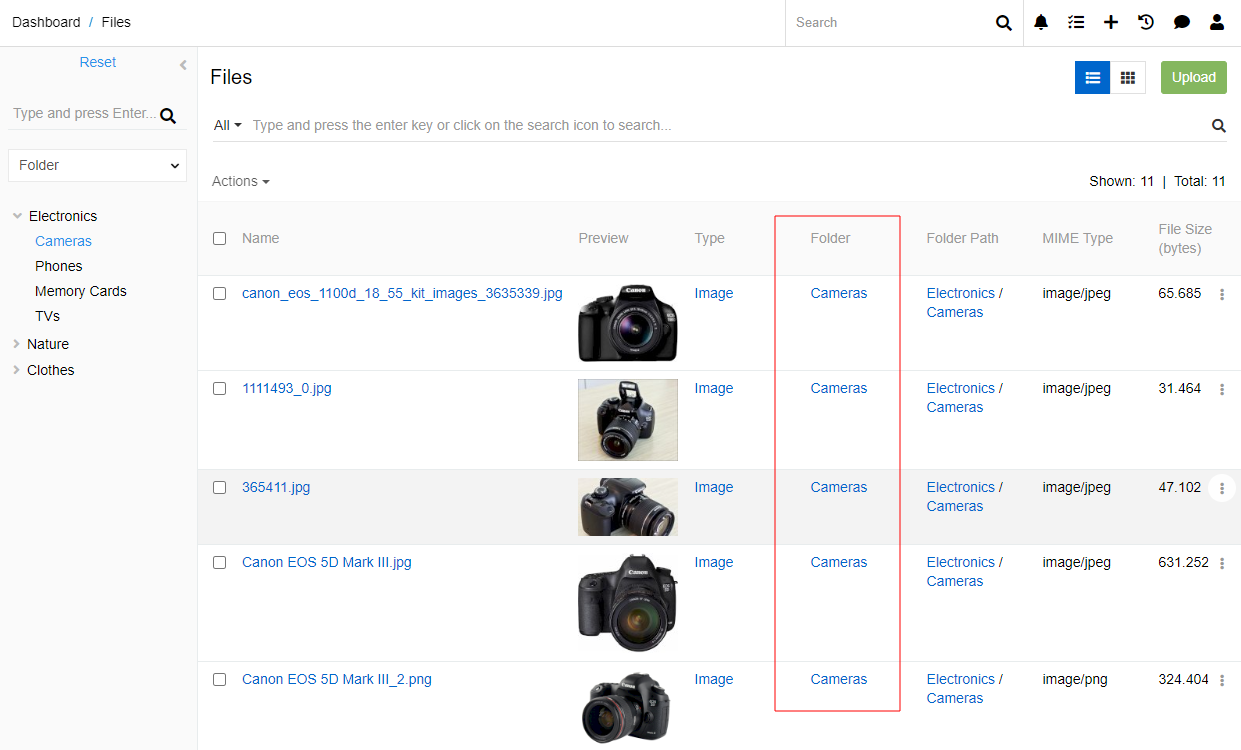
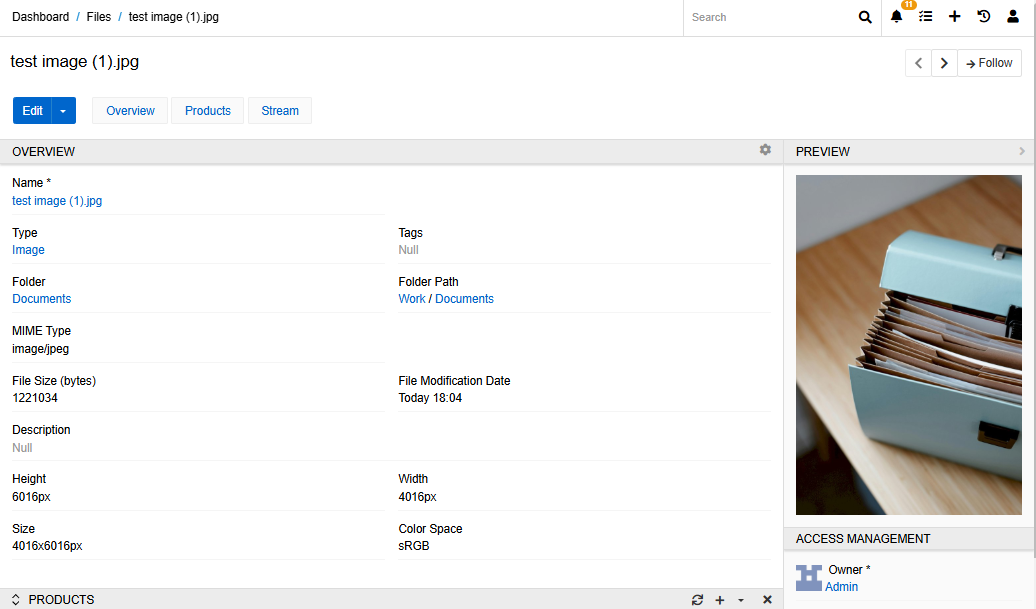
File Fields
The File entity comes with the following preconfigured fields:
| Field Name | Description |
|---|---|
| Name | The file name. The value is set automatically and can be modified by the user |
| Preview | Preview of the file |
| Type | The file type |
| Folder | The folder where the file is located |
| Folder path | The path to the folder where the file is located |
| MIME Type | indicates the nature and format of a file |
| File Size | File size in bytes |
| Description | The description of the file |
| Size | File width by height in pixels. Set automatically for images and PDF files |
| Color Space | A characteristic that describes a fixed range of possible image colors. Set automatically for images and PDF files |
| Width | Width of the file. Set automatically for images and PDF files |
| Height | Height of the file. Set automatically for images and PDF files |
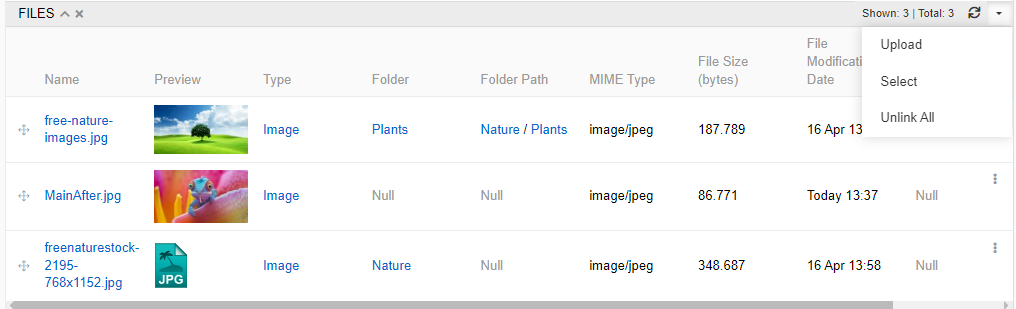
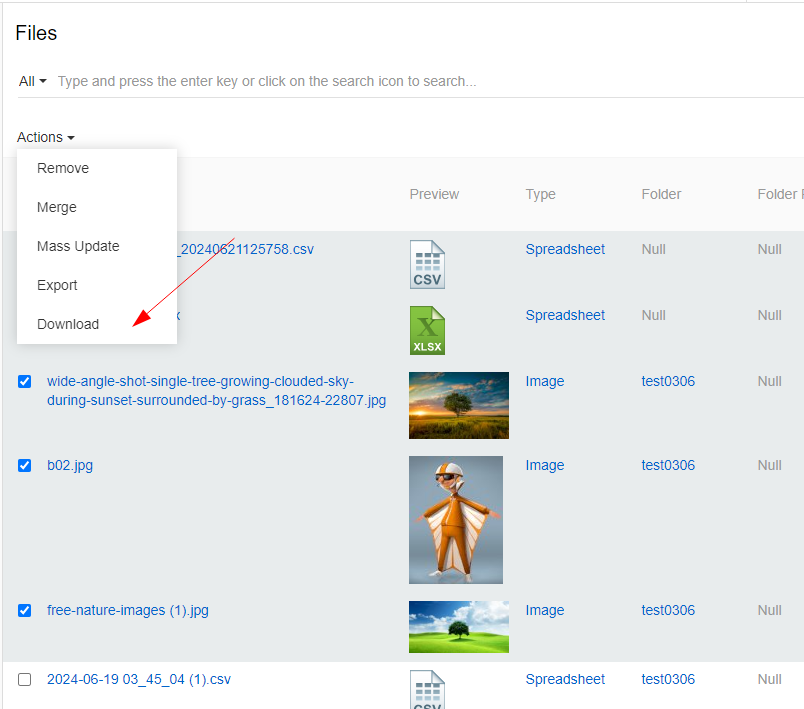
Downloading Files to an archive
The following mass actions are available for Files: Remove, Merge, Export, Mass Update and Download - a special action that is available only for the File entity. This action creates an archive with all selected Files added to its root folder. If files are duplicated, they will be presented in the archive only once.
To download files to the archive, select all the Files you want to download (there must be at least two) and click on Download button in the dropdown list.
A message "Job was successfully added to Job Manager" will appear. You can monitor its progress in the Job Manager.

As soon as the archive is ready for download, you will receive a Notification.
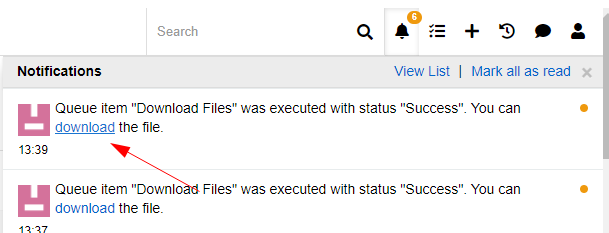
Click on the download link to download the archive to your computer.
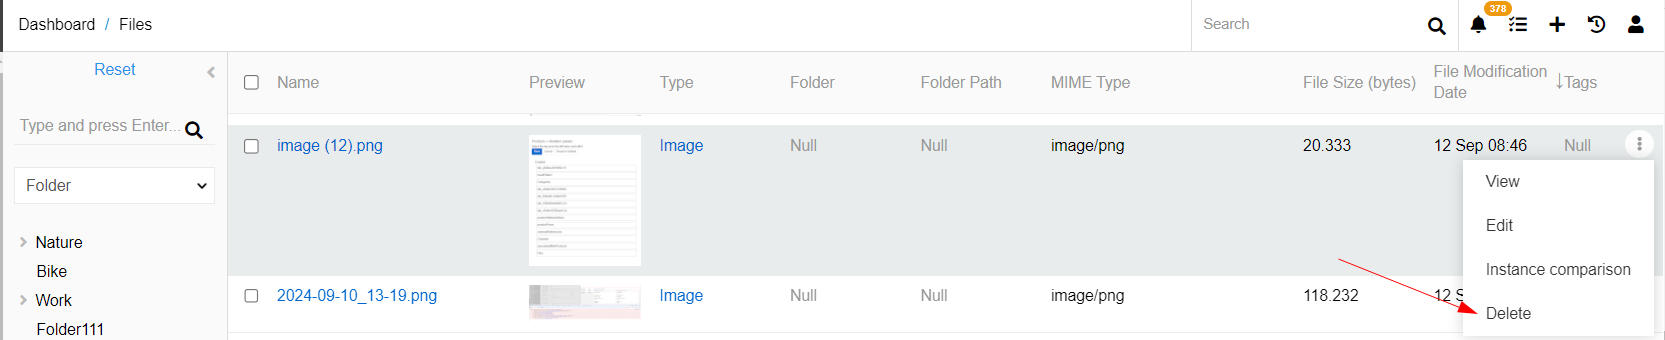
Deleting and restoring files
You can delete a File separately, or several Files at once using mass action Delete. To delete a file, click on the dot menu icon and select option Delete.
After deletion, the File will be stored in the database for another 14 days by default. Select the Deleted filter to see all deleted entity records. If you want to clean up the space and delete the File permanently, use the Delete permanently action. Once a file is permanently deleted, it cannot be restored.
As long as a File or Folder has not been deleted from the database, you can restore it. When you restore a record, all field values and relationships are also restored. That is, if the File was linked to a Product before deletion, it will reappear on the Product page after restoring.

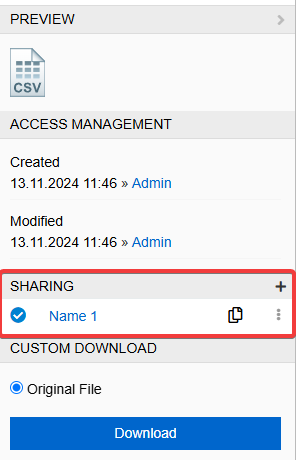
File sharing
If you want to share a file from your PIM, you can of course download it and share it by other means, but there is an easier way. You can create a share link for the selected file so that non-PIM users can see it. To do this, go to the File Edit menu and click on the Sharing submenu in the right panel.

Here you can set options for the link: 1) File is automatically added to the current file (although you can still edit it) and is only mandatory field. 2) Link will be created automatically. 3) Allowed usage is the number of successful transitions using this link. If it is not set, there is no such parameter. 4) Used shows the number of successful transitions through this link. 5) Valid Till is the time limit for the link. Note that there is no validation, so you can have an expired link for historical reasons. 6) Name is necessary if you want to name this link in PIM. 7) Description is for PIM use only. 8) For export feed is automatically created if the link is used in export feed. You cannot edit it.

Now you can see what the link looks like and edit/delete it.