Table of contents
Attributes
Attributes – characteristics of a certain product that distinguish it from other products, e.g. size, color, functionality, components and features that affect the product's attractiveness or acceptance in the market.
An attribute can be assigned to only one attribute group. Value of a certain attribute set for a certain product is called product attribute value. It is possible to define the same product attribute different values for each channel.
Attributes can be assigned to several Classifications, so if the product for that Classification is created, the selected attribute will be added to the product attributes automatically.
Attributes can be activated or deactivated. Deactivated attributes cannot be used in the system, e.g. no values can be set to them or transferred via any channel. All the values of the deactivated attributes are hidden and will be shown again after the attribute is activated again.
Attribute Fields
The attribute entity comes with the following preconfigured fields; mandatory are marked with *:
| Field Name | Description |
|---|---|
| Type | Attribute types are predefined in the system and can be defined via the drop-down menu |
| Code * | Unique attribute code, consisting of small letters (a..z), numbers (0..9) and underscore symbol ("_") |
| Name * | Attribute name, can be set in different languages |
| Attribute Group | Attribute group name |
| Attribute Tab | Attribute tab name |
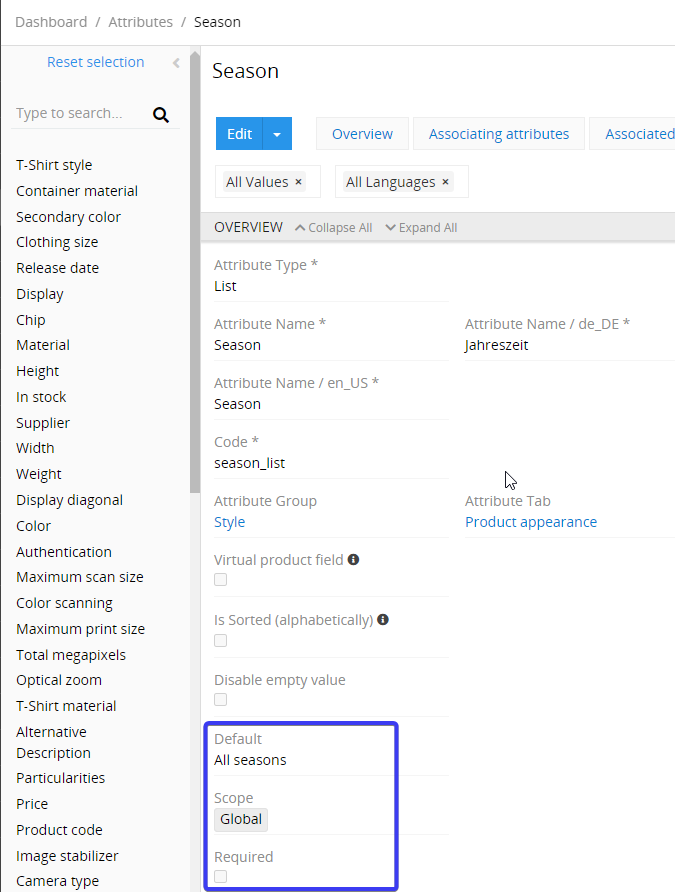
| Default value | you can define a default value for an attribute of type "Unit". If the default value is set it will be applied automatically, as soon as an attribute is assigned to a product. |
| Scope | The default scope can be set to "Global", or to "Channel", if the attribute should have a channel-specific value, in this case you also need to choose a Channel. Default Scope and Channel are applied to an attribute when the attribute is assigned to an Attribute Group or a Product directly. |
| Required | When checked the attribute will be marked as required for an Attribute Group or for a Product, as soon as it is assigned. |
If multiple attributes are assigned to an Attribute Group or to a Product at once the default Scope, Channel and Required option are always applied.
If you want to make changes to the attribute entity (e.g. add new fields, or modify attribute views), please contact your administrator.
Available Attribute Types
Attributes are automatically validated according to their type. The following attribute types are available in the base AtroPIM system:

| Attribute Type | Description |
|---|---|
| Float | Number with a decimal part |
| Float Range | Bounadry values of type float |
| Integer | Integer attribute |
| Integer Range | Bounadry values of type integer |
| HTML | Text area for long multiline texts that contains a built-in HTML editor |
| Markdown | Text area for long multiline texts that contains a built-in Markdown editor |
| String | Short text attribute |
| Text | Text area, for long multiline texts |
| Url | URL with a hyperlink, which is automatically created |
| Date | Date picker with the calender and option to set up the date manually |
| DateTime | Date and time picker |
| File | File attachment |
| List | List of possible values, which is set up upon the attribute creation or editing; a single value can be set for the attribute. |
| Multi-value List | List of possible values, which is set up upon attribute creation or editing; multiple values can be set for the attribute. |
| Array | String array, where each attribute can get more than one value. |
| Boolean | Checkbox for the attribute |
The Advanced Data Types module provides the ability to create attributes of other types, such as alias and script. You can read more about these types here Advanced data types.
Creating
To create a new attribute record, click Attributes in the navigation menu to get to the attribute list view and then click the Create Attribute button. The common creation pop-up window will appear:
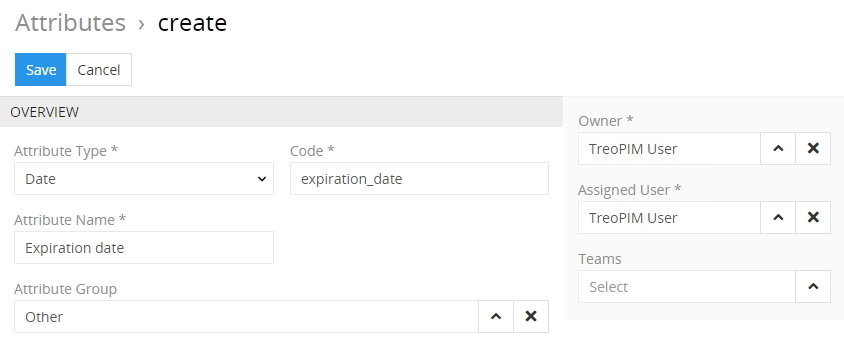
Here enter the attribute name and code and select its type from the Attribute Type drop-down list. Define its attribute group using the corresponding select button, if needed. Your username is loaded to the Owner and Assigned user fields by default. You can change them via the corresponding select buttons, as well as define the team, if needed. Click the Save button to finish the attribute record creation or Cancel to abort the process.
If the attribute code is not unique, the error message will appear notifying you about it.
Please, note that attribute type cannot be changed after the attribute is created.
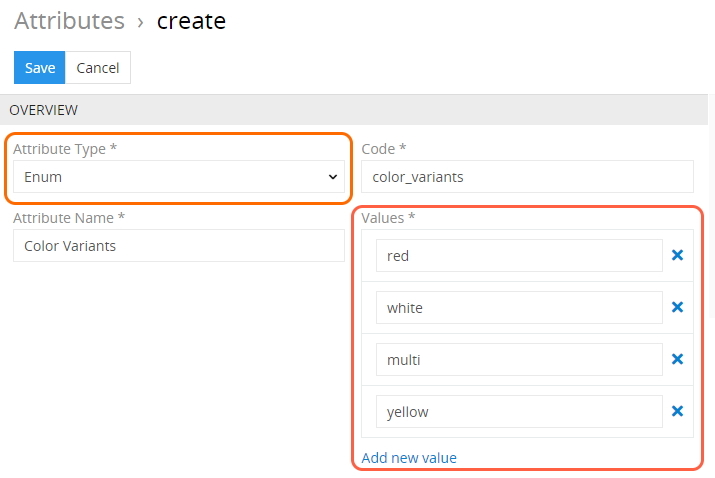
When creating attribute records of the Enum, Multi-Enum, Enum Multilang, and Multi-Enum Multilang types, their attribute values should also be defined:
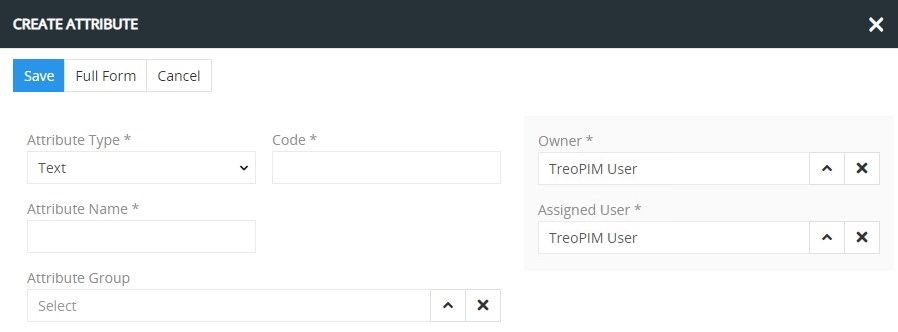
Alternatively, use the quick create button on any AtroPIM page and fill in the required fields in the attribute creation pop-up that appears:
Listing
To open the list of attribute records available in the system, click the Attributes option in the navigation menu:
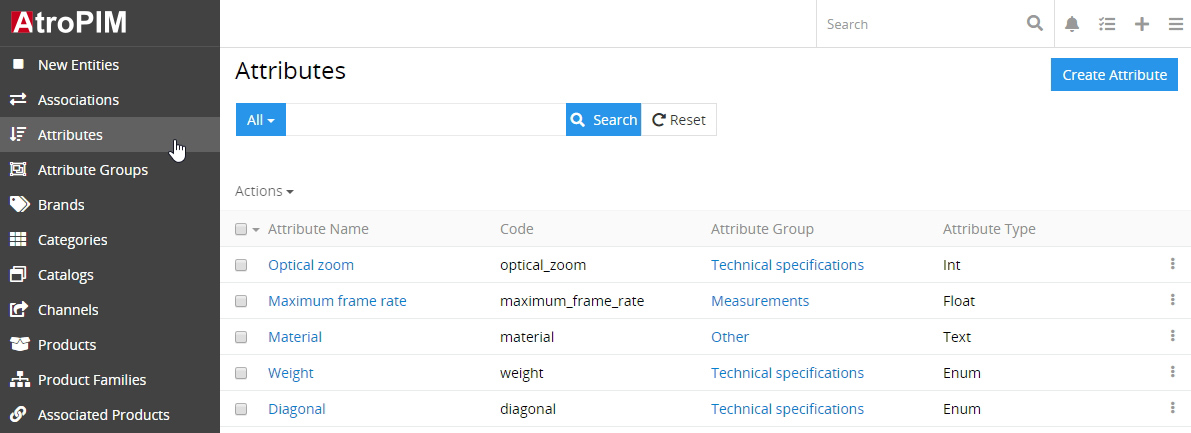
By default, the following fields are displayed on the list view page for attribute records:
- Attribute name
- Code
- Attribute group
- Attribute type
To sort attribute records order in the list, click any sortable column title; this will sort the column either ascending or descending.
Attribute records can be searched and filtered according to your needs. For details on the search and filtering options, refer to the Search and Filtering article in this user guide.
To view some attribute record details, click the name field value of the corresponding record in the list of attributes; the detail view page will open showing the attribute records. Alternatively, use the View option from the single record actions menu to open the quick detail pop-up.
Mass Actions
The following mass actions are available for attribute records:
- Remove
- Mass update
- Export
- Add relation
- Remove relation

For details on these actions, please, see the Mass Actions section of the Views and Panels article in this user guide.
Single Record Actions
The following single record actions are available for attribute records:
- View
- Edit
- Remove
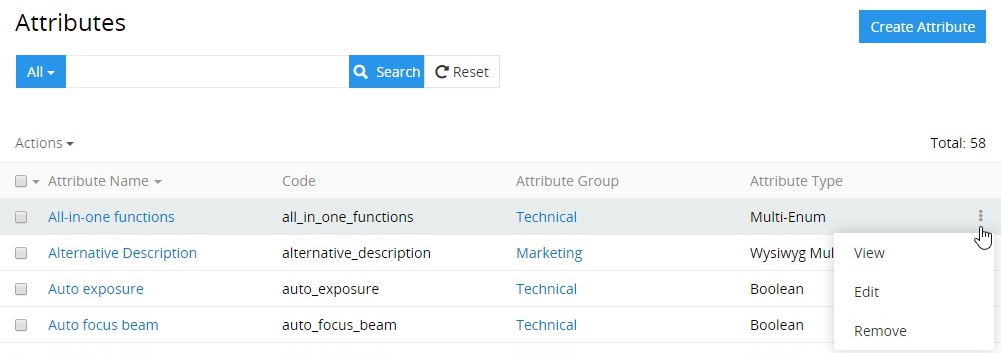
For details on these actions, please, refer to the Single Record Actions section of the Views and Panels article in this user guide.
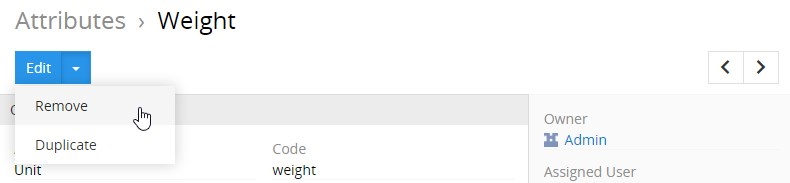
Editing
To edit the attribute, click the Edit button on the detail view page of the currently open attribute record; the following editing window will open:
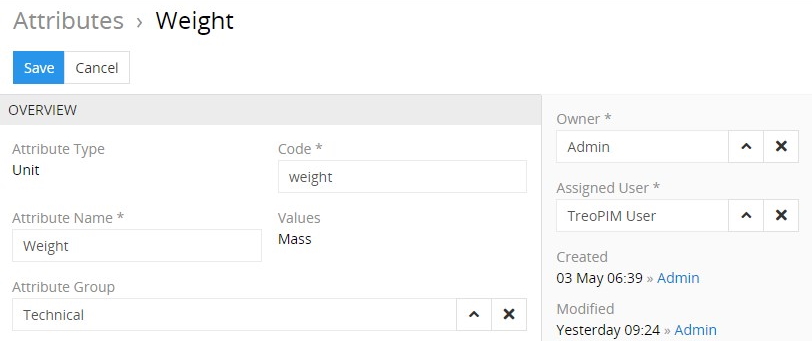
Here edit the desired fields and click the Save button to apply your changes.
Besides, you can make changes in the attribute record via in-line editing on its detail view page.
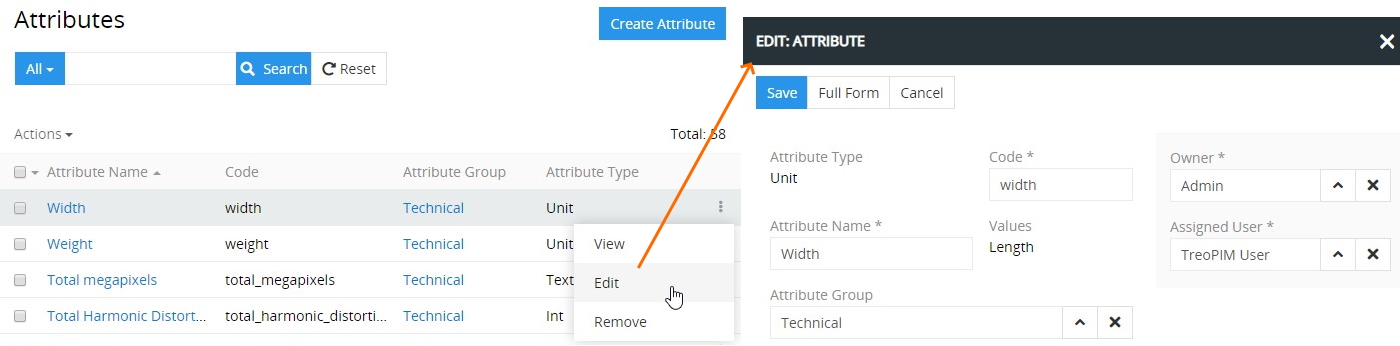
Alternatively, make changes to the desired attribute record in the quick edit pop-up that appears when you select the Edit option from the single record actions menu on the attributes list view page:
Associated Attributes
The System has the functionality of automatic attribute linking to a Classification or Product data record. If some attribute is assigned other related attributes will be assigned as well. This is realized with the help of hierarchies. Attributes is a hierarchical entity. After a new record is created you can assign Associated Attributes and Associating Attributes to it.
- Associating Attributes – are "parent" attributes, assigning of which will cause automatic assiging of the current attribute.
- Associated Attributes – are "child" attributes, which will be automatically assigned if the current attribute is assigned.
In the Tree Panel you can see the full attribute hierarchy and change it by using drag-and-drop.
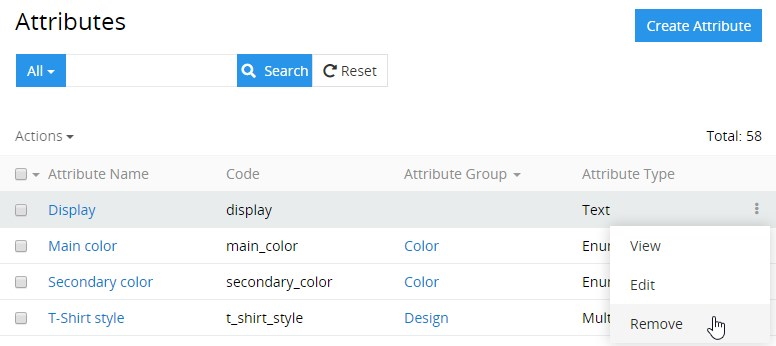
Removing
To remove the attribute record, use the Remove option from the actions menu on its detail view page
or from the single record actions menu on the attributes list view page:
By default, it is not possible to remove the attribute if there is any product or Classification linked with this attribute. The following confirmation pop-up appears:
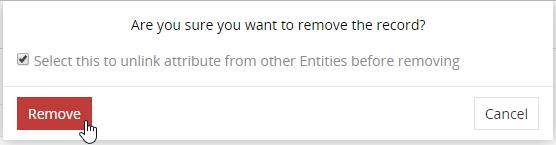
Select the checkbox to unlink the attribute record from other entities and click Remove to complete the operation. Click Cancel to abort the process.
Duplicating
Use the Duplicate option from the actions drop-down menu to go to the attribute creation page and get all the values of the last chosen attribute record copied in the empty fields of the new attribute record to be created. Modifying the attribute code is required, as this value has to be unique.
Numeric attribute types
There are two types of attributes for displaying numeric data in PIM: Integer and Float. And also the ranges of these two types (Integer Range and Float Range). For all attribute types, you can specify a minimum and maximum allowable value (1).
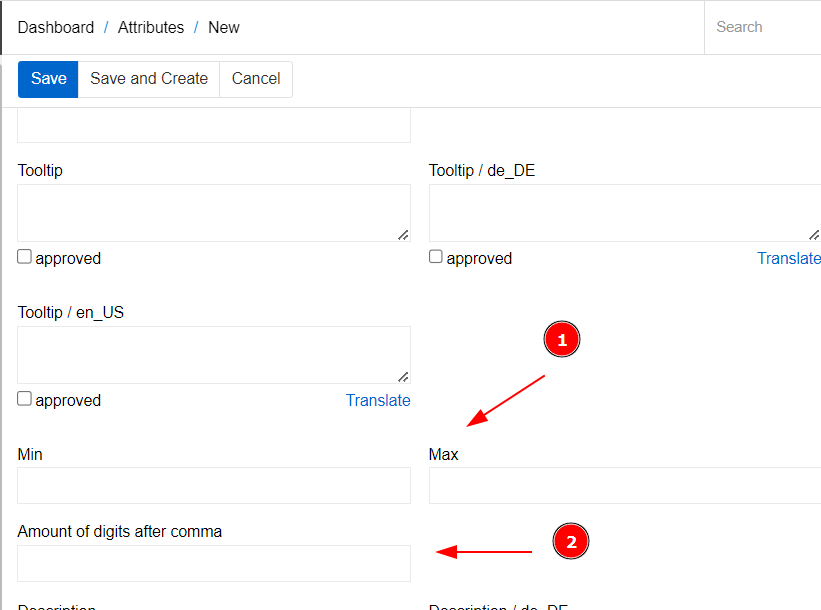
If you specify these fields for the attribute, the value of the attribute when entered will be validated according to them. If the entered value is not within the valid range, the error message "Value shouldn't be greater (less) then ..." will appear on the screen.
For float or float range attributes, you can also specify the number of decimal places allowed (2). If you leave of this field empty, the number of decimal places is limited to 12 digits by default.
Units of measurement
Units of measurement can be added to attributes of numeric and string type. The "Measure" and "Unit" fields are used for this. A measure is a separate entity that is related to attributes by a many-to-one relationship. You can add an unlimited number of units to each measure and also choose the unit that will be used by default.
To create a new measure record, click Measures in the navigation menu (if it is not there, you can add it through Administration --> User interface) and then click the Create Measure button. A page for creating a new measure will open
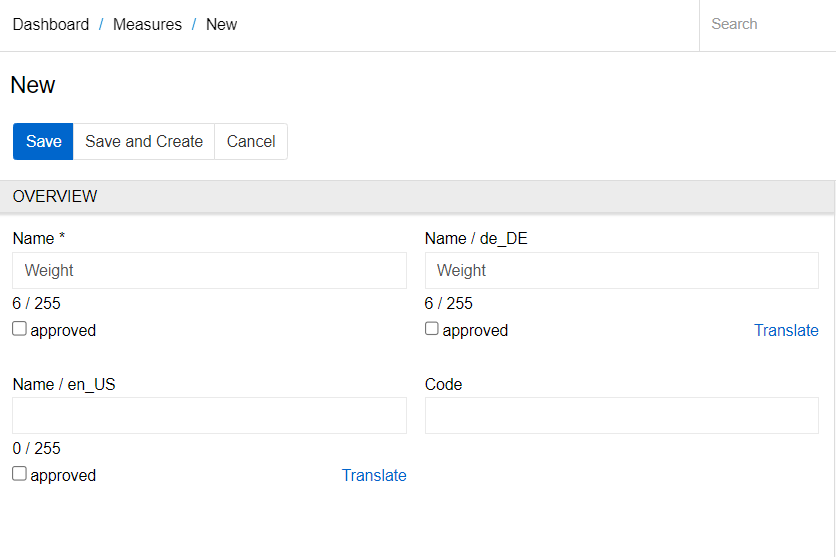
Enter the measure name and code (by default, this field is optional) and click the Save button. To add a new unit to the measure, click the "Create" (+) button on the Units tab. Unit creation pop-up window will appear:
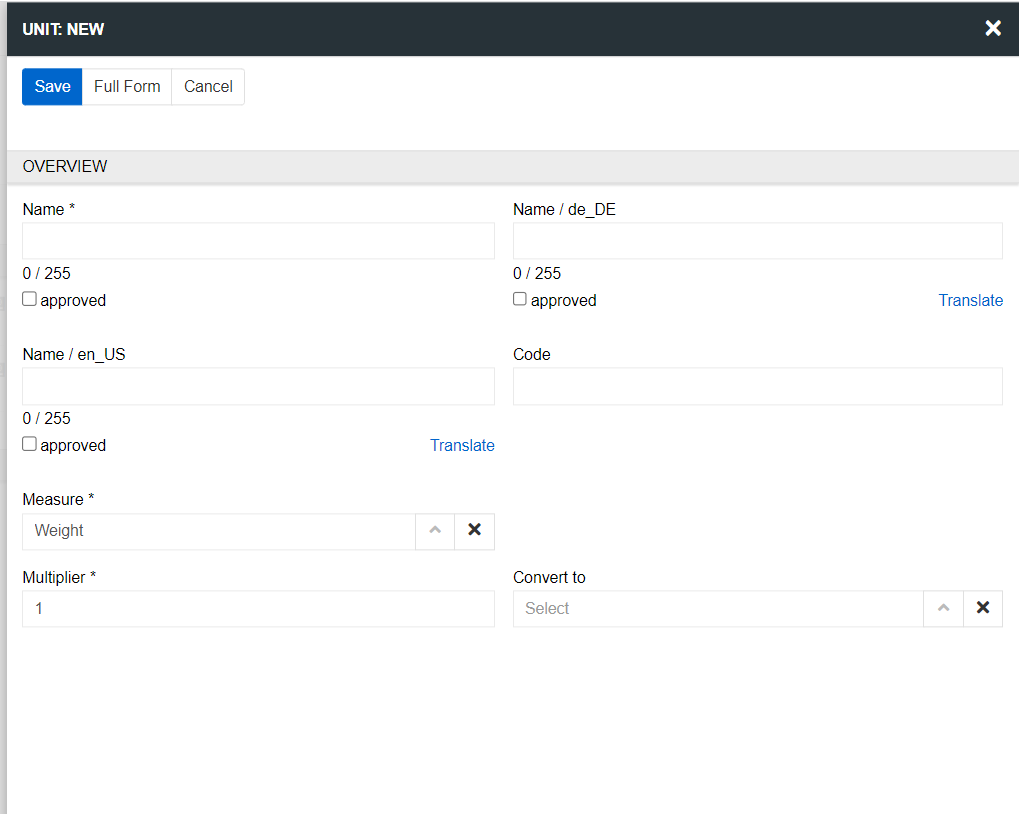
You can create a unit from the measure entity, or vice versa: go to the Unit entity, create a new unit via the "Create Unit" button and choose the measure to which you want to add it. In the "Convert to" field, you can choose the units of measurement to which the current unit should be converted. A default unit can be selected for both the measure and the attribute to which the measure is added.
Attribute of Text, String and HTML type
There are three types of attributes for displaying text-related data in PIM: Text, String and HTML.
Attributes of these types can have max length. You can count it in bytes or characters. If the text length is exceeded, an error message "Text field length exceeded" is displayed when trying to save. This function can be switched off if the max length is not defined.
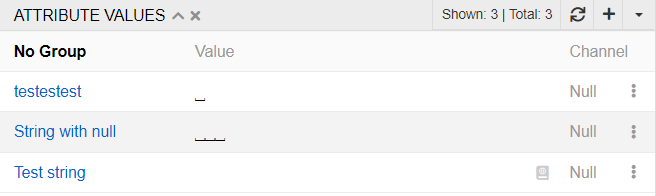
All text-related attributes have option Disable Null Value, which determines whether the attribute can or cannot have a value of Null.
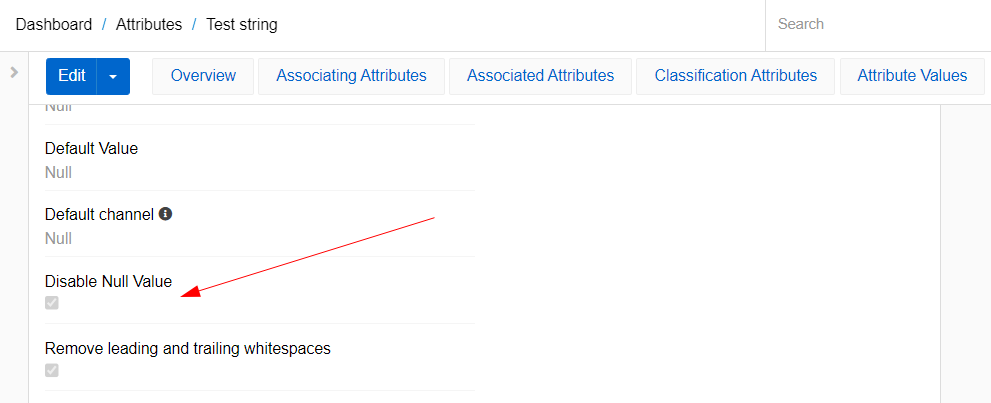
If this checkbox is not selected, the attribute can be set as null or empty. If the checkbox checked, the attribute can only have an empty value. A value of null is displayed in the view and edit mode using a placeholder "Null". Empty value is displayed as empty field in the view mode and as "None" in edit mode.
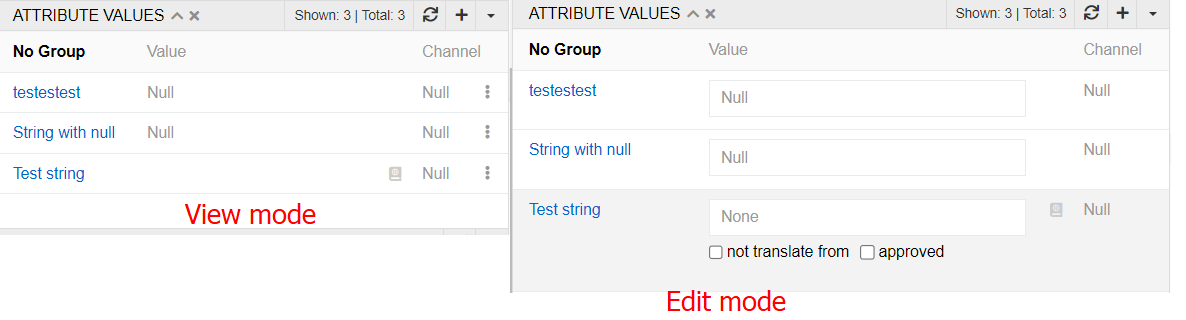
By default, the attribute is added to the product with Null value. To change it to a empty, you need to write a single space. Then the placeholder "Null" will disappear in the edit mode, which means that the attribute will be saved with empty value. If you delete text from an attribute, it gets the value empty. To get Null, you need to click the backspace button again. Note that the values null and empty are different for the system. Therefore, if a parent product has an attribute value of Null and a child product has an attribute value of empty, this attribute will be marked as uninherited.
The attribute of type String also has option "Remove leading and trailing whitespaces". It allows you to remove extra spaces before and after the text. If the option is not selected, the spaces are highlighted with a special character in the view mode.
Attribute of Date and Date-time type
There are two types of attributes for displaying time-related data in PIM: Date and Date-time. For Date attribute you select a date on a calendar in pop-up or type it. For Date-time attribute you can also select time in pop-up or type it.
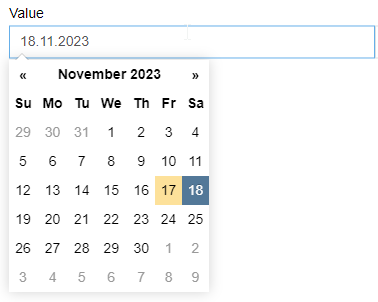
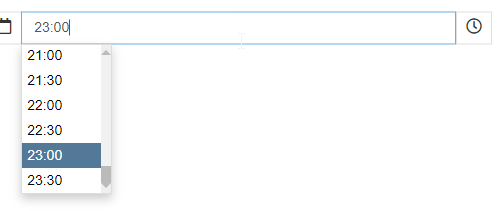
The date and time is set in Universal time but the presentation of it is localized to your current selected time zone. This helps with integration issues and also with actualizing data when the time zone is changed.
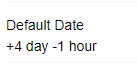
You can set a Default Date for both types of attributes. This is a function that will move the date and/or time forward or backwards as you set. So, for the example below, if you select Date-time as 10th November 12:00 it will be set in attribute value as 14th November 11:00.
For Date attributes the time defaults are not applicable.
Changing attribute type
Type of a created attribute can be changed only to Alias or Script. All values will be changed but the product attributes will remain. Please use this feature with care.