Table of contents
First Steps with AtroPIM
How to Import Your First Product List
Before making your first import, make sure you have added all the attributes that you have in your product list.  If the 'Import Feeds' module does not automatically appear on your navigation dashboard, click on 'menu'.
 Then click on 'administration'.
  Scroll down to the 'Customization' section and click on 'User Interface'.
 Click 'add' and select 'Import feeds'.
  Then press 'Save' and reload the system. If you encounter further problems accessing the modules, go to 'administration' and 'click' on modules to check whether they are installed in your system.
Typically, the Import Feeds module is available on the navigation dashboard automatically and you proceed to the following steps for importing your first product list straight away:
- Navigate to the Import Feeds module: сlick on "Import Feeds" in the navigation menu and then click on the "Create Import Feed" button.
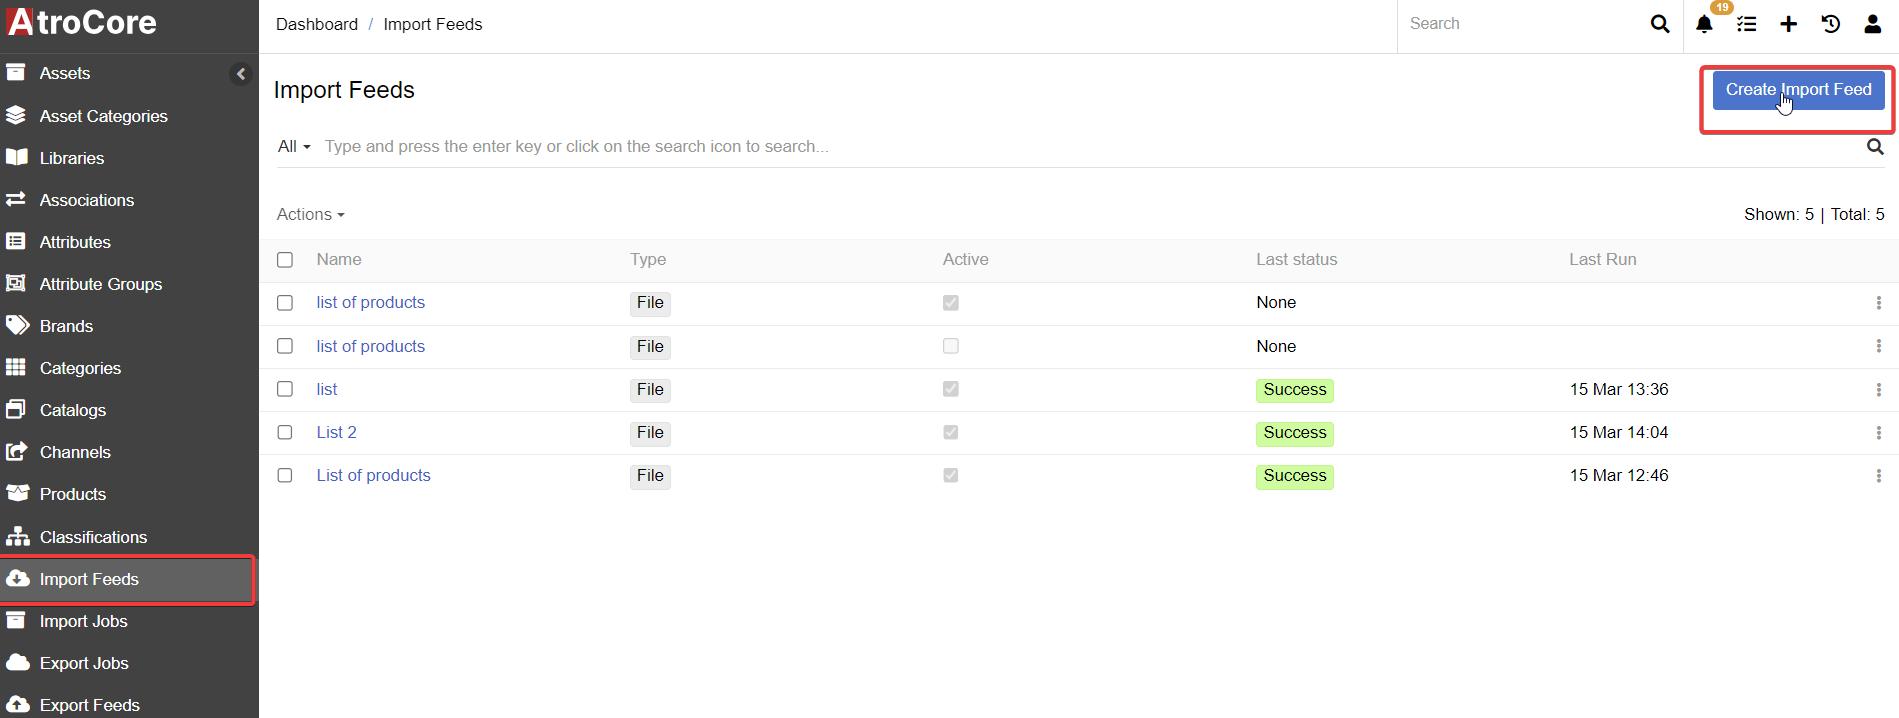
- Enter a name and description (optional) for your import feed. Make sure the "Active" checkbox is checked so the import feed is enabled.

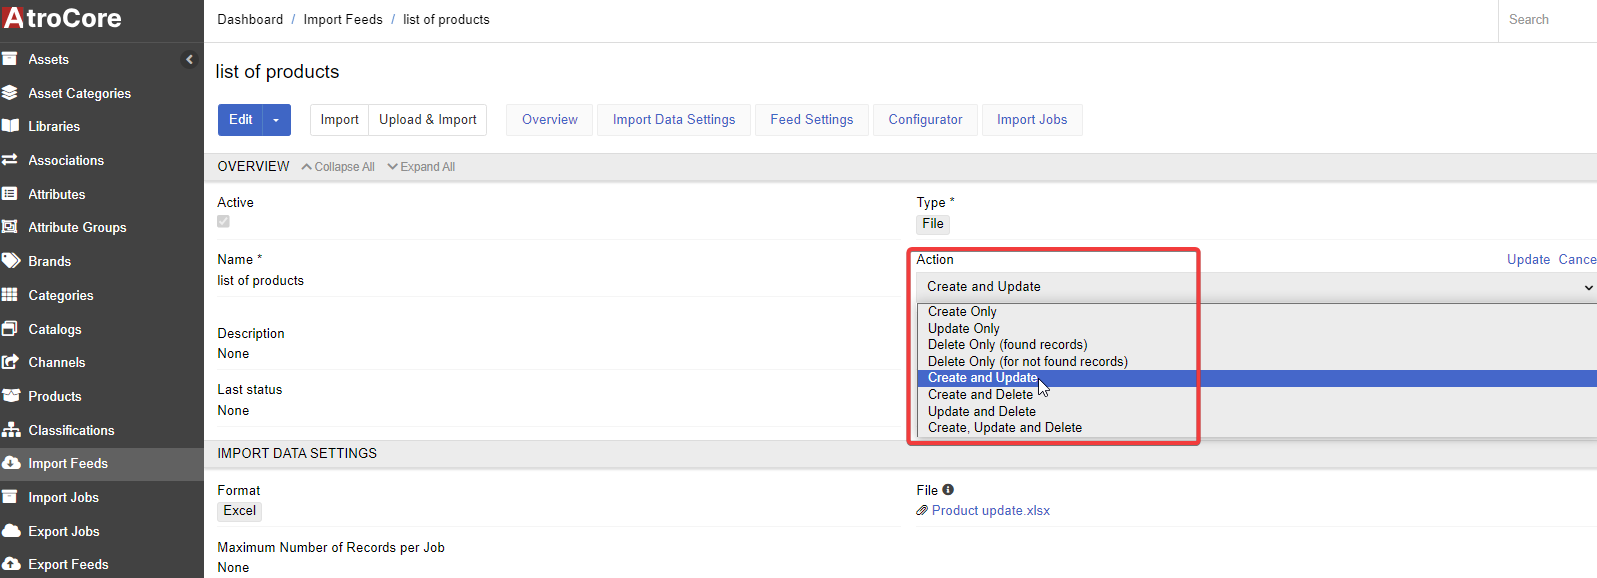
- Specify the type of action you would like to perform with the product list, for example, 'create and update'.
- Choose the file format (CSV or Excel) and upload the file containing your product data.

- Specify the maximum number of records per import job (optional: if you leave it empty, your file will be imported in one import job).

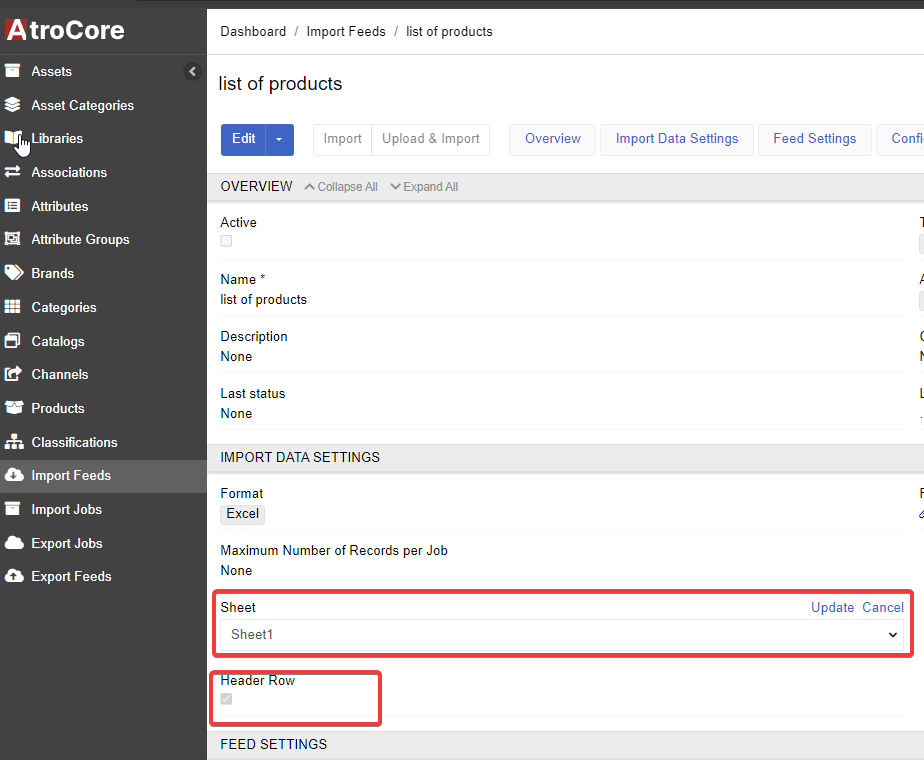
- Select the appropriate sheet if you're using an Excel file and check the "Header row" box if your file contains column names in the first row.
- Select the entity type (in this case, "Product") from the dropdown list and press save

- Define any list value separators or unused source fields (columns) (optional: if there are columns in your import file that you don't need for the import process, you can specify them as unused so they won't affect the import).
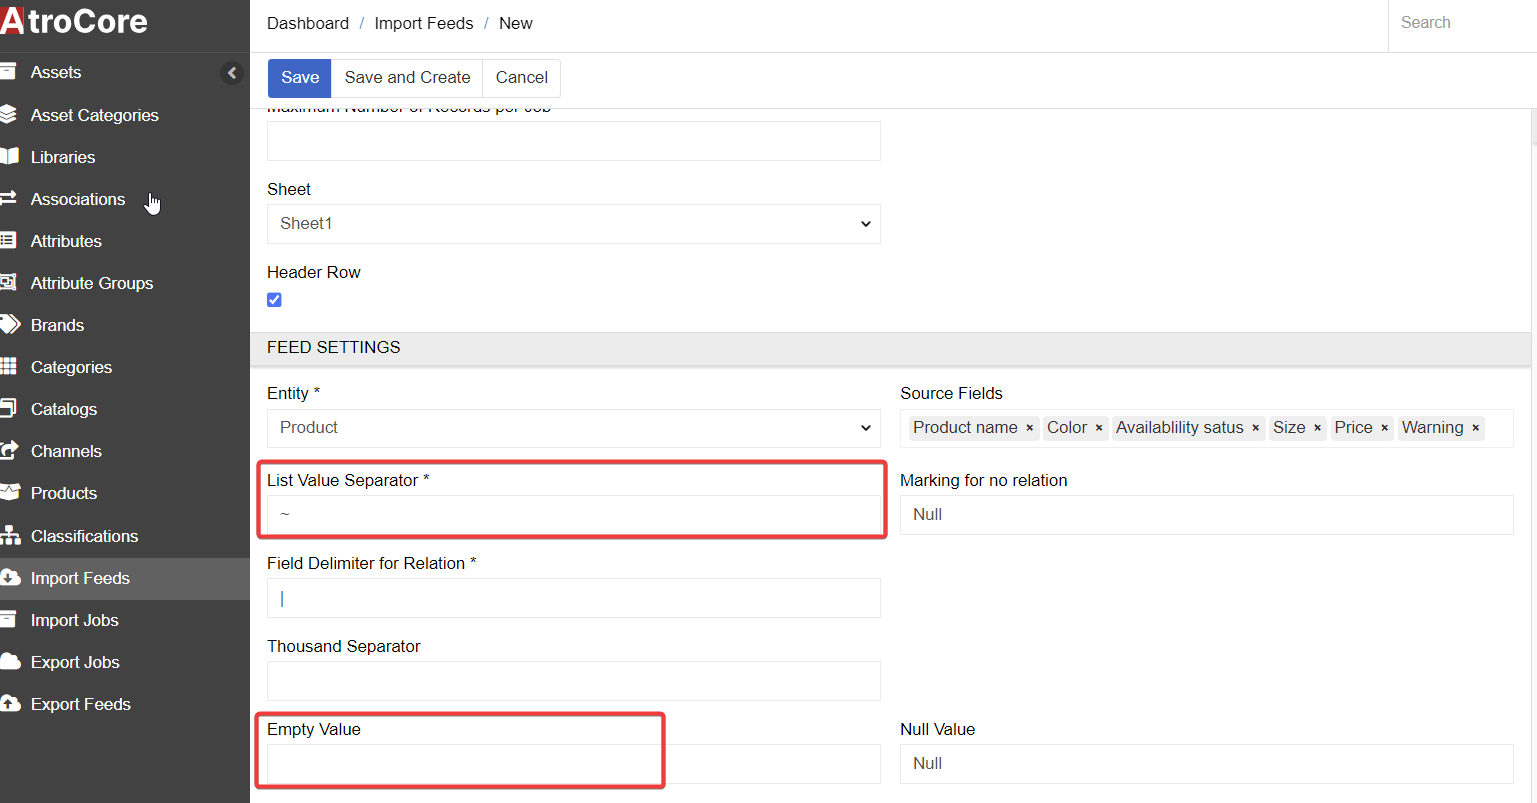
- Press Save.

- Click on the "Configurator" tab to map your product data fields and click on (+) to add your fields.
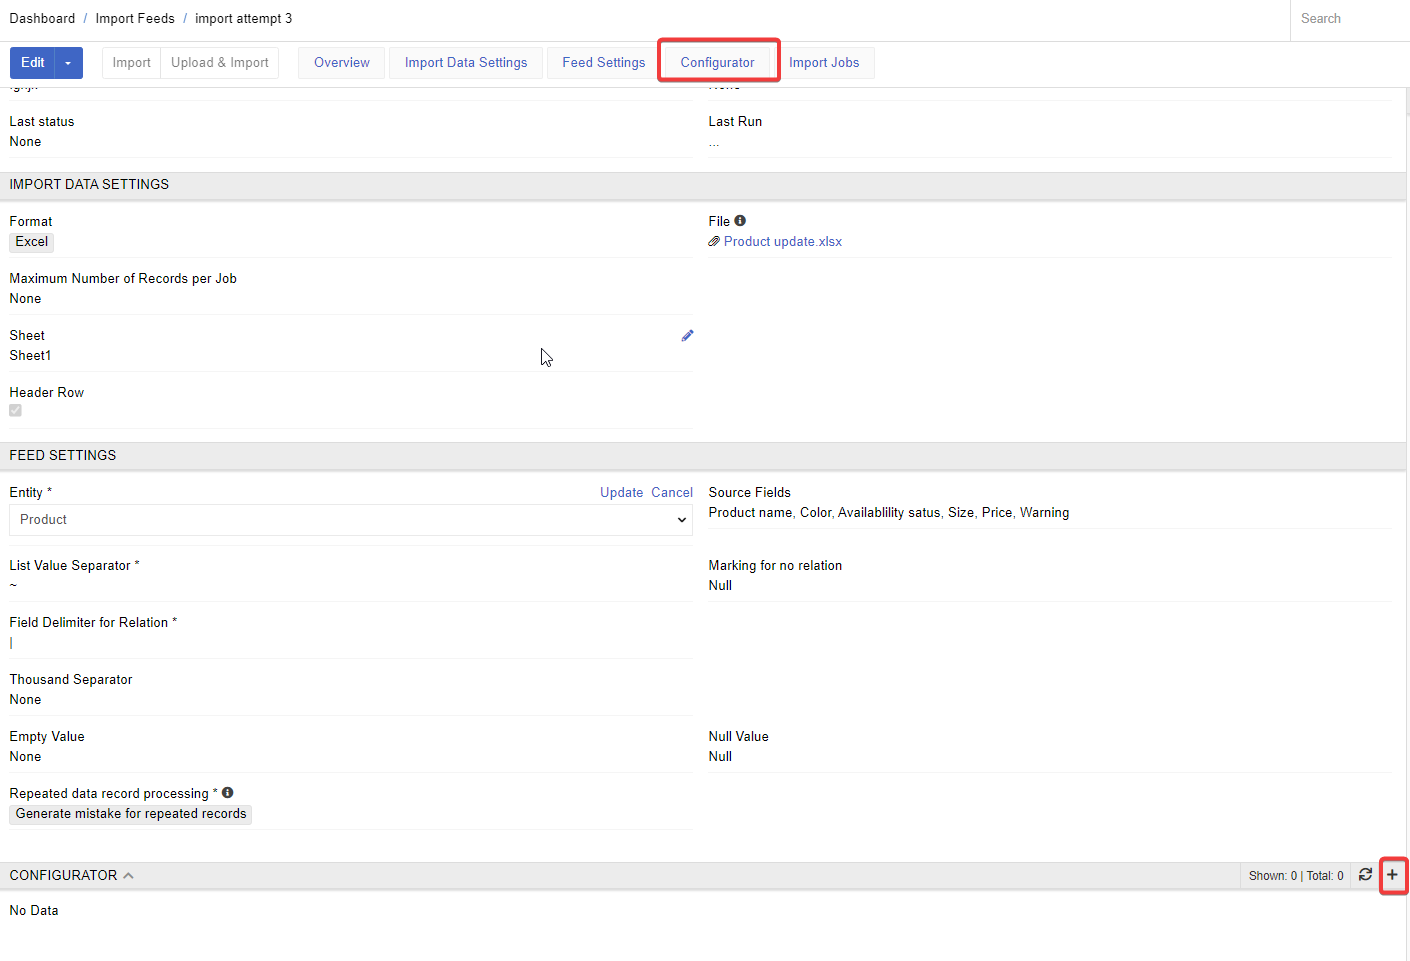
- For each field, choose the corresponding column from your file or set a default value. Remember to add to the configurator all the fields that you want to import.
If needed, mark fields as identifiers to uniquely identify products. Keep in mind that attributes cannot be identifiers for products.
If you want to import a product list, you have to set the product name as a field in the configurator.
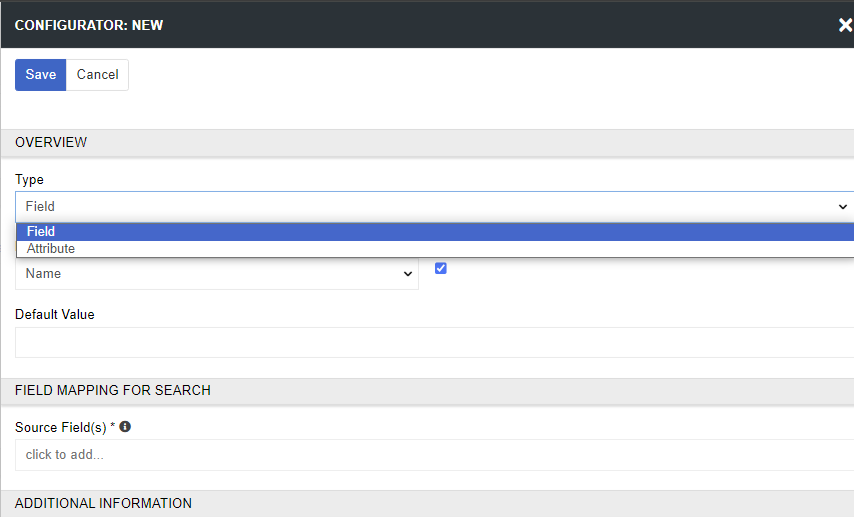 You can also mark the product name as an identifier if you want your products to be searched by their names.
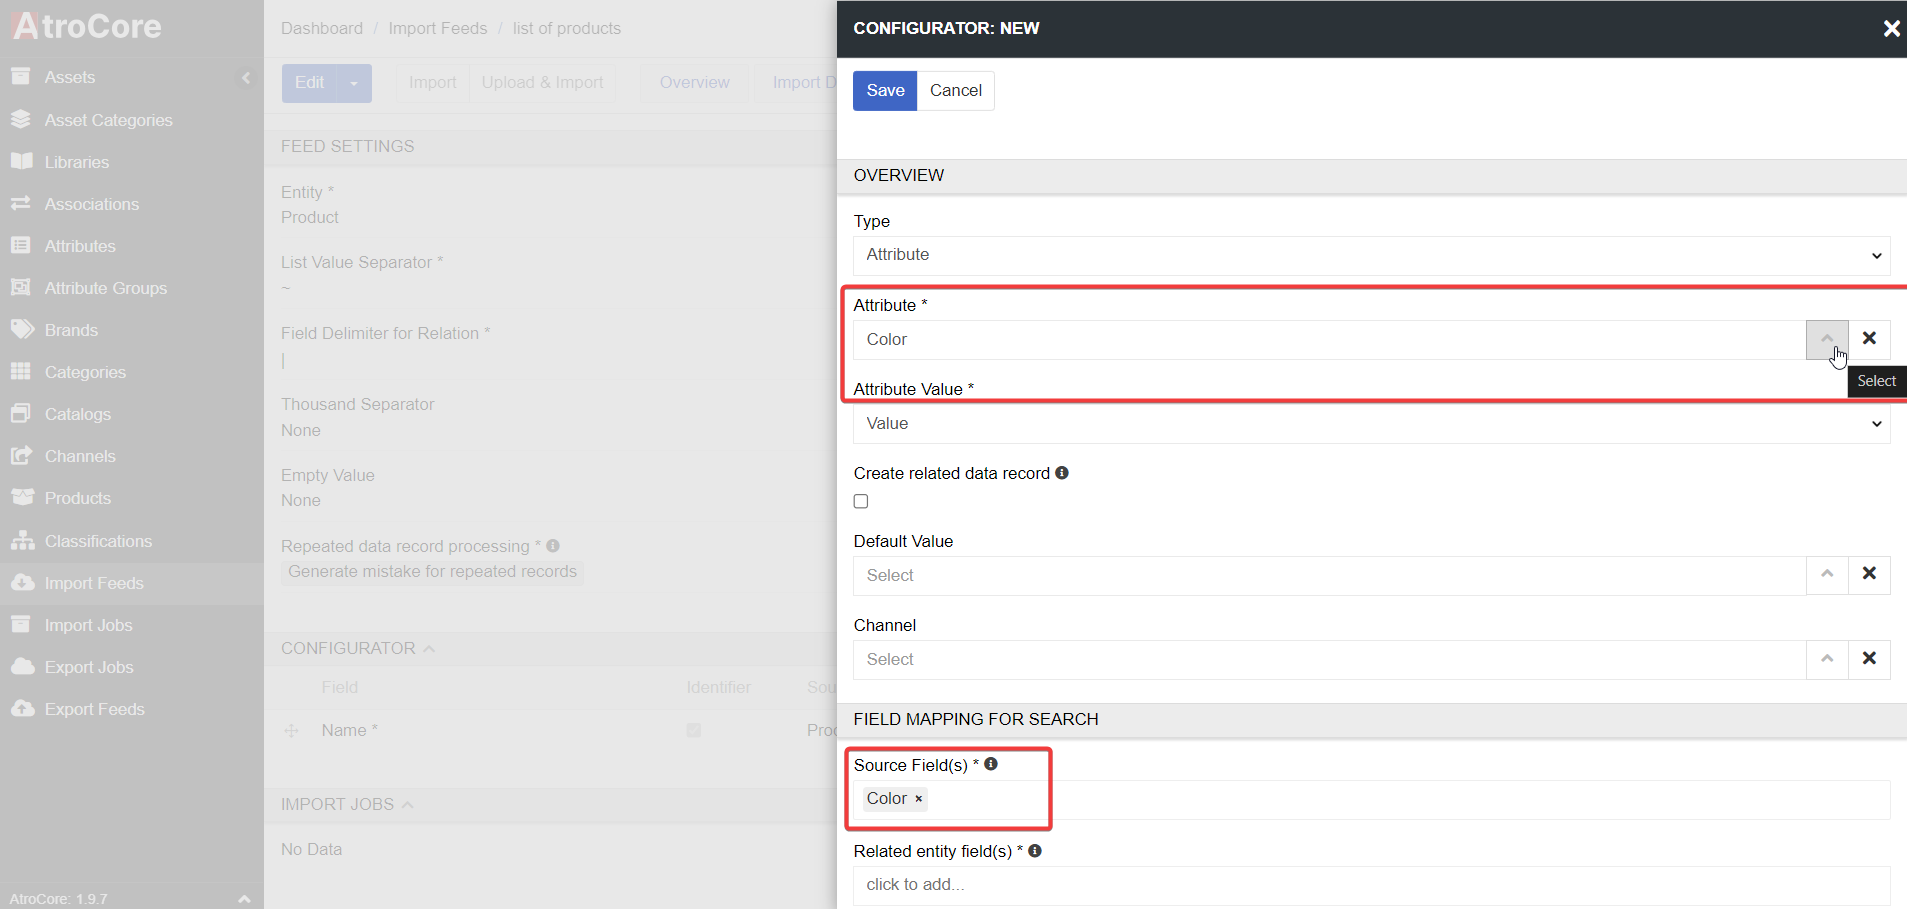
 - If your product list contains attributes, you also have to add them to the configurator. When you press "select" in the attribute, you will see all the attributes that you have previously added to "attributes" and choose the attribute you need in the "source fields".
- If your product data includes relations to other entities (e.g., brands or categories), configure these mappings as well.
- Configure Asset Import (Optional)
- If your product data includes images or other assets, set up mappings for these as well.
- Click on the "Import" button to start the import process.
 You can either import using the uploaded file or upload a new file for import.
Monitor the import job's progress in the Job Manager.
 - Once the import job is complete, review the results in the Import Jobs panel.
Check for any errors or issues encountered during the import process.
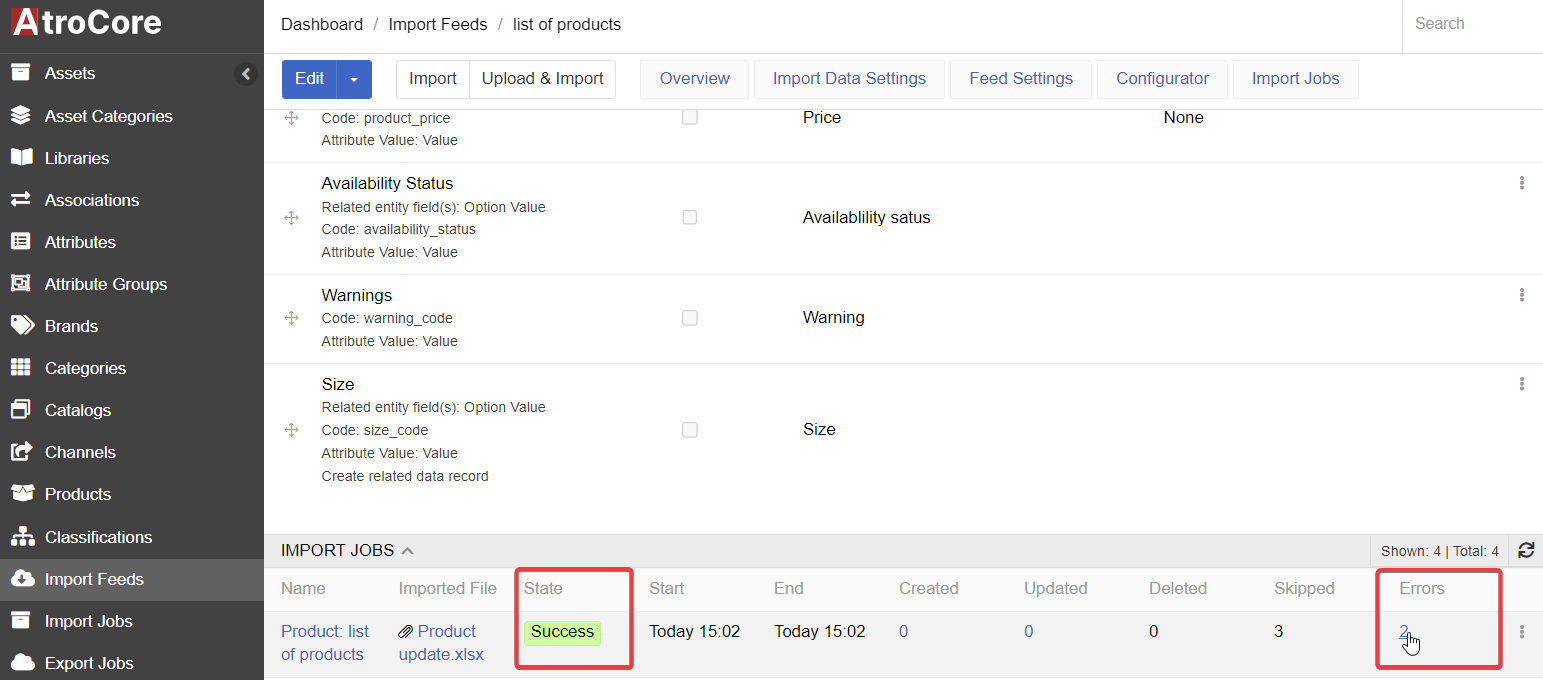 Click on the errors if needed to correct any errors and re-import data if necessary.
For more information on data import, get familiar with the detailed article Import Feeds. You can explore a functioning import feed in our public demo here.
How to Import Your Product List with Product Images
If your product list contains product images, you can easily import them through their URLs. Images, videos, and other types of files are assets.
Let's imagine you want to import a product list that contains the main images of a certain product and other product images. In this case, when setting up your import feed configuration, you should designate the field type for the main product image as "Main Image" and choose the type "Assets" for all other images. 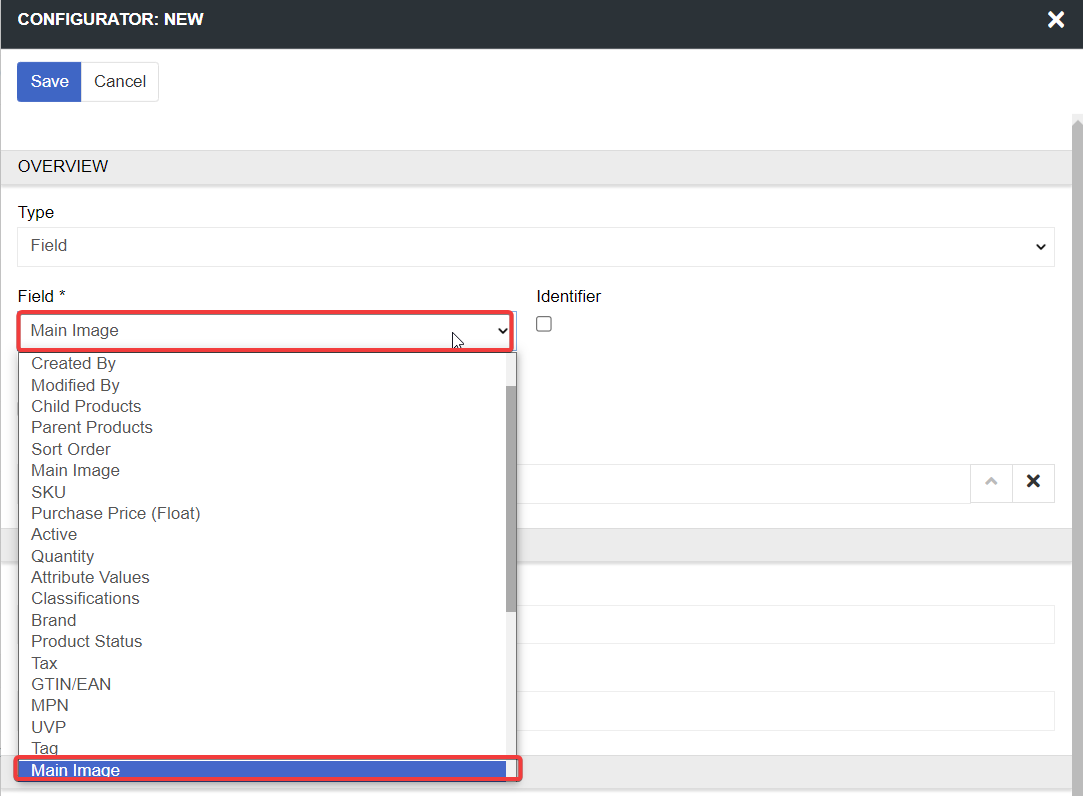
 This ensures that the system understands which image is the primary one for each product and how to handle the rest of the images associated with the products.
If you want to import assets from provided URLs, you need to choose the URL as a related entity field.
  It's best to import all assets and the main image via a single import job. This ensures that the importing order is correct.
Assets should ideally be configured first, followed by the main image. This ensures that the system understands the hierarchy and relationships between the images and products during the import process.
Once your import feed is configured, execute the import process. The system will create related data records by linking each product with its corresponding images based on the mappings you've set up.
After the import is complete, review your products to ensure that each one is correctly linked to its images. Make any necessary adjustments if images are missing or incorrectly linked.
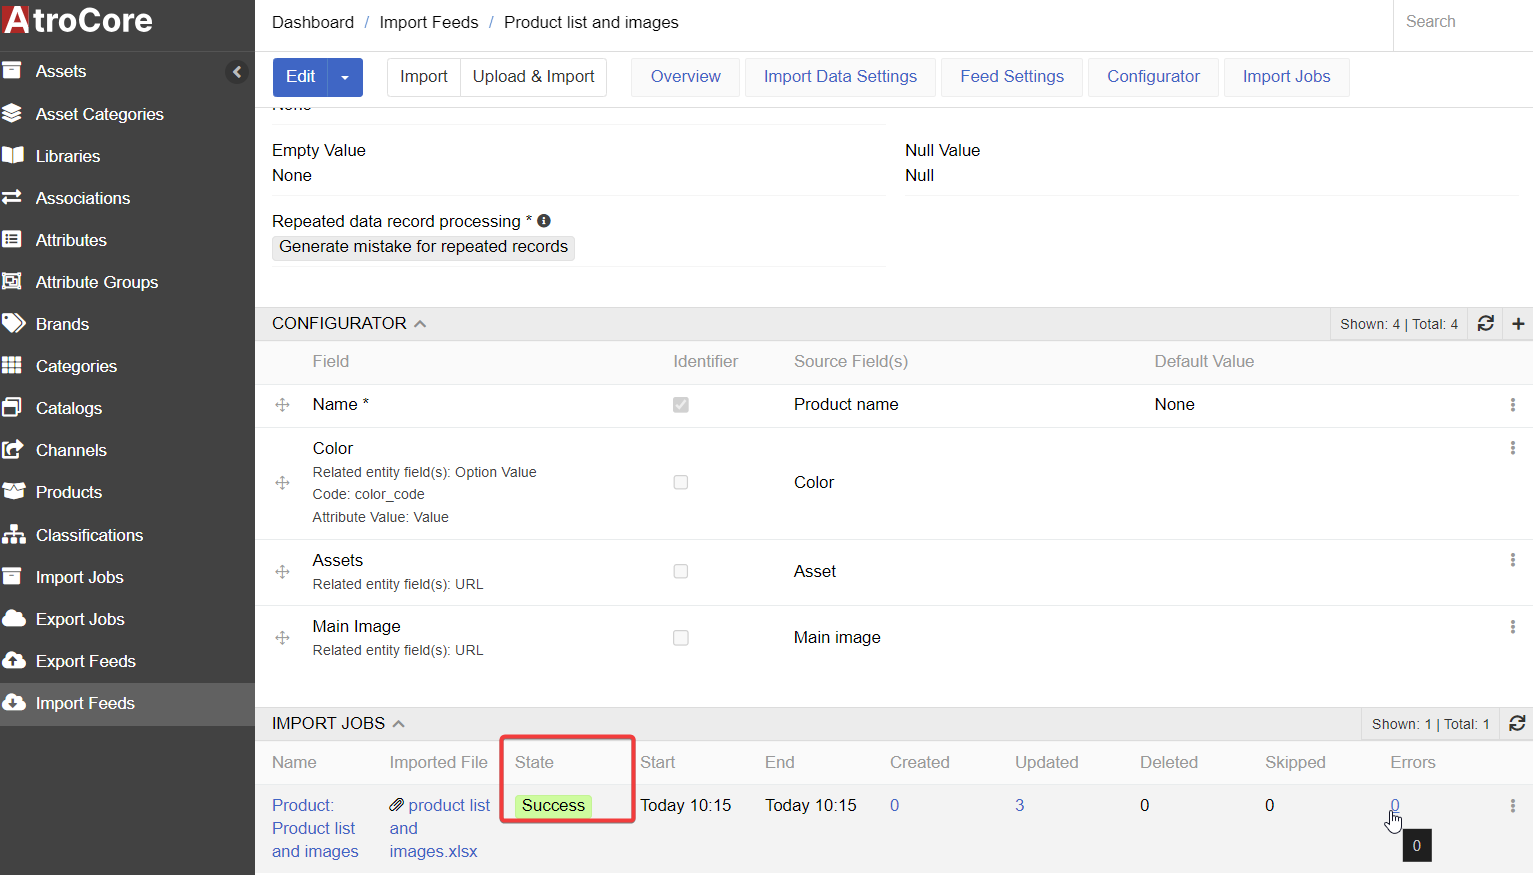 You may also need to configure separate rules for assets and main images. Read more on the import of related assets here.